Best Bitter is a cornerstone of British brewing tradition, known for its balanced flavors, approachable bitterness, and sessionable character. Whether you’re a homebrewer keen on replicating classic pub-style beer or a microbrewer exploring traditional styles, mastering the Best Bitter brewing process is both enjoyable and rewarding. This guide will walk you through everything from selecting the right ingredients to fermentation tips and bottling techniques, so you can craft a Best Bitter that delivers that quintessentially British taste.
Introduction to Best Bitter Beer Style
Best Bitter, also often called English Bitter or Ordinary Bitter, is a sub-style of British Pale Ale that typically ranges from about 3.8% to 4.6% ABV. It is known for being malt-forward yet balanced with moderate hop bitterness. The flavor profile often features toasted malt, caramel notes, and earthy or floral hop characteristics. Originating from traditional English pubs, Best Bitters are renowned for their drinkability and satisfying flavors that pair perfectly with hearty food.
This style emphasizes balance rather than extremes, making it an excellent project for brewers who appreciate subtlety and tradition. Now, let’s dive into the ingredients that form the foundation of this classic beer style.
Key Ingredients Used in Best Bitter Brewing
The quality and selection of ingredients directly impact the final character of your Best Bitter. Below are the essentials:
- Malt: Best Bitter typically uses British pale malt as its base, which provides a crunchy bread-like backbone. Crystal malts, such as British Crystal 60L or 80L, offer caramel sweetness and color, while a small addition of biscuit or amber malt can add complexity and nuttiness.
- Hops: Traditional English varieties like East Kent Goldings, Fuggles, or Challenger are preferred for their mild, earthy, and floral hoppiness. These hops contribute the signature moderate bitterness without overpowering the malt.
- Yeast: A classic English ale yeast strain is crucial to developing the bright, fruity esters characteristic of Best Bitter. These yeasts often produce moderate attenuation, helping to retain malt body and sweetness.
- Water: Soft water with low mineral content is ideal, typical of many English brewing regions, to allow the malt flavors to shine through.
Step-by-Step Brewing Process Overview
Brewing Best Bitter involves a series of carefully controlled steps. From preparing your ingredients to fermentation and eventual bottling, attention to detail is key. Here’s the general process:
- Mash the grains to extract fermentable sugars
- Boil the wort with hops for bitterness and aroma
- Cool and transfer wort to fermenter
- Pitch yeast and ferment under controlled conditions
- Condition and carbonate the beer before packaging
Each step has nuances that can tweak your beer’s aroma, mouthfeel, and final flavor profile, which we’ll cover next.
Mash and Wort Preparation Techniques
The mash stage converts starches from malted barley into fermentable sugars that yeast will consume. For Best Bitter, maintaining moderate mash temperatures in the range of 148–154°F (64–68°C) is recommended. A lower mash temperature favors a drier, lighter body with more fermentable sugars, while the higher end encourages more dextrins and sweetness, contributing to the beer’s body.
When mashing:
- Use a mash tun capable of holding a consistent temperature.
- Conduct a single infusion mash for simplicity and authenticity.
- Maintain a mash pH around 5.2 to 5.6 to optimize enzyme activity and wort clarity.
After mashing, you’ll sparge with water to extract remaining sugars and collect your wort. The wort should have an original gravity (OG) between 1.040 to 1.048 for typical Best Bitters.
The boiling stage typically lasts 60 minutes. Schedule hop additions as follows:
- Primary bittering hops at the start of the boil for bitterness
- Flavor hops mid-boil (around 30 minutes remaining)
- Aroma hops in the last 5 to 10 minutes or at flameout for enhanced aroma
Using multiple hop additions balances bitterness and hop aroma without overwhelming the malt profile.
Fermentation Specifics for Best Bitter
Fermentation is where the yeast imparts its signature fruity esters and character. Choose a dependable English ale yeast strain like Wyeast 1098 British Ale or Safale S-04 for best results.
- Temperature: Ferment between 65–68°F (18–20°C) to encourage moderate ester production without excessive off-flavors.
- Duration: Primary fermentation usually lasts 7-10 days, followed by a secondary conditioning phase of 1-2 weeks to smooth out flavors and clarify the beer.
- Oxygen: Proper wort aeration prior to pitching yeast is essential for healthy fermentation.
Monitoring gravity readings helps ensure fermentation completes fully and on schedule.
Tips for Optimizing Flavor and Clarity
Best Bitter benefits from careful attention to detail throughout brewing and conditioning. Here are some tips:
- Water chemistry: Adjust water profiles if needed to soften hardness and reduce sulfate levels, emphasizing malt character.
- Fermentation control: Use a fermentation chamber or temperature-controlled environment to avoid off-flavors caused by excessive heat.
- Cold crashing: Lower the temperature close to freezing after fermentation to promote yeast and protein sedimentation for clarity.
- Fining agents: Consider adding Irish moss or gelatin during conditioning to enhance clarity.
- Carbonation: Best Bitters typically have moderate carbonation (about 1.8 – 2.2 volumes of CO2) to retain smooth mouthfeel but still lift the aromas.
Bottling and Conditioning Best Bitter at Home
After fermentation and conditioning, bottling is the final step for homebrewers.
- Sanitation: Meticulously sanitize bottles, caps, and equipment to avoid contamination.
- Priming sugar: Add the correct amount of priming sugar for natural carbonation in the bottle, typically about 3/4 cup corn sugar per 5 gallons.
- Filling: Fill bottles leaving about an inch of headspace to reduce oxidation.
- Conditioning: Store bottles at room temperature for 2–3 weeks to allow carbonation to develop, then refrigerate before serving.
Proper carbonation and conditioning bring out the smoothness and gratifying finish Best Bitter is known for.
Common Troubleshooting and FAQs
It’s normal to encounter issues as you develop your Best Bitter brewing skills. Here are answers to some common challenges:
- Beer tastes too sweet: Consider raising the mash temperature slightly or use more attenuative yeast to dry out the finish.
- Excessive bitterness: Reduce bittering hop additions or shorten the boil time of the hops.
- Cloudy beer: Implement cold crashing, fining agents, and improve sanitation practices.
- Off-flavors (e.g., solvent or phenolic): Keep fermentation temperature controlled and pitch healthy yeast.
- Lack of carbonation: Ensure proper priming sugar amounts and bottle sealing integrity.
Enjoying Your Handcrafted Best Bitter
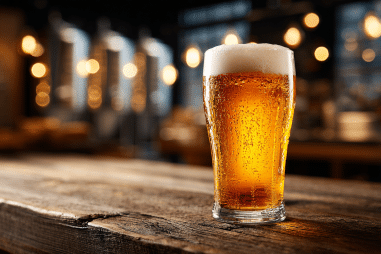
Once you’ve crafted your Best Bitter, take the time to appreciate the depth of tradition and craftsmanship it embodies. Pour it into a classic tulip or dimpled pint glass, allowing the amber color and creamy head to invite you in. The balance of malt sweetness and hop bitterness, with underlying fruity ester notes, makes Best Bitter the perfect companion for a cozy evening or hearty meal.
Brewing Best Bitter is not just about producing a beer—it’s about connecting with a rich heritage and refining your brewing skills along the way. With patience, attention to detail, and passion, you’ll soon savor a beer that is truly your own.