If you’re a beer enthusiast looking to take your brewing skills to the next level, crafting Kellerbier at home is a fantastic adventure. Known for its refreshing taste, lightly hopped character, and signature cloudy appearance, Kellerbier is a traditional German-style unfiltered lager that can be deeply satisfying to create from scratch. This beginner-friendly guide will walk you through everything you need to know, from ingredients and equipment to fermentation and bottling, so you can enjoy that distinctive Kellerbier flavor right from your own kitchen or garage.
Introduction to Homebrewing Kellerbier
Kellerbier, which translates to “cellar beer” in German, is a classic style that hails from Franconia, a region in Bavaria. Traditionally, it was brewed simply and stored in cool cellars for natural conditioning, resulting in a smooth, slightly sweet taste with moderate hop bitterness and a delightful cloudy appearance due to its unfiltered nature. This style is approachable for homebrewers and offers a unique challenge for those used to clearer lagers, as it embraces a rustic charm with its natural yeast and proteins left in suspension.
Brewing Kellerbier at home gives you the freedom to experiment with malt profiles and hop varieties while capturing that authentic, fresh-tasting character. It’s ideal for those who want to brew a beer that’s flavorful, easy-drinking, and visually distinct from your average pale lager. Plus, the process helps you learn more about working with lagers and managing fermentation temperatures.
Necessary Ingredients and Equipment
Before you start, gathering the right ingredients and equipment is vital to successfully crafting Kellerbier:
Ingredients
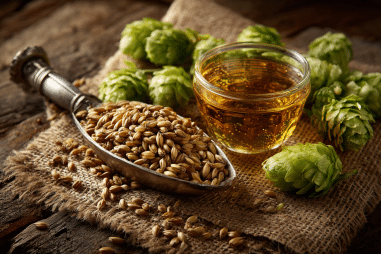
- Malt: Kellerbier typically relies on Pilsner malt as its base, sometimes combined with Munich malt or Vienna malt to add a subtle maltiness and depth.
- Hops: Noble hops such as Hallertau, Tettnang, or Spalt are traditional choices, lending a gentle floral and spicy bitterness.
- Yeast: Lager yeast strains are essential for the clean fermentation profile. Many brewers opt for German lager yeasts like Wyeast 2308 or White Labs WLP820.
- Water: Soft to moderately hard water works well, mirroring the water profile of Franconian regions.
- Other: You may also need priming sugar for bottling and possibly some Irish moss or Whirlfloc tablet to aid clarity if you want to slightly reduce haze without filtering.
Equipment
- Homebrewing kettle (5 gallons or more)
- Fermentation vessel with airlock (carboy or fermenter bucket)
- Temperature control system (cooling chamber, fermentation fridge, or temperature-controlled room)
- Siphoning tubes and bottling setup
- Sanitization supplies
- Hydrometer or refractometer to monitor gravity
- Bottles and caps, or kegs depending on your packaging preference
Step-by-Step Brewing Process
Once you have all your ingredients and equipment ready, you can dive into brewing your Kellerbier. Here’s a simplified overview of the process:
Mashing
Begin by heating your malted grains in water at around 148-152°F (64-67°C) to extract fermentable sugars and create a balanced malt profile. Hold this temperature for about 60 minutes to optimize enzyme activity. After mashing, raise the temperature to around 168°F (76°C) for mash out, then drain the wort.
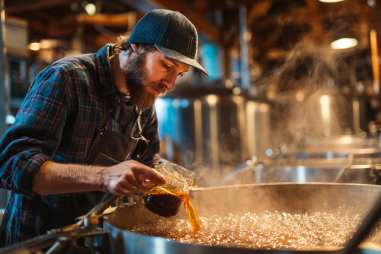
Boiling
Bring the collected wort to a boil, typically lasting 60 minutes. Add hops according to your recipe, usually in stages during the boil to achieve mild bitterness with floral and spicy hop aroma—emphasizing the classic noble hop character.
Cooling and Transfer
After the boil, quickly cool the wort to a fermentation-friendly temperature (around 50°F/10°C for lagers). Transfer the wort to your sanitized fermenter to prepare for yeast pitching.
Pitching Yeast
Once cooled, pitch your chosen lager yeast into the wort. It’s important that the temperature is stable and within yeast’s ideal range to avoid off-flavors.
Fermentation Guidance for Kellerbier Style
Fermentation is one of the most critical steps in crafting great Kellerbier. It typically involves a two-stage process:
- Primary fermentation: Maintain a cool but steady temperature between 50-55°F (10-13°C) for about 2 weeks. This allows the lager yeast to work efficiently and produce minimal esters and phenols, keeping the beer clean.
- Lagering: After primary fermentation, lower the temperature to around 35-40°F (2-4°C) and lager for 4-6 weeks. This cold conditioning helps mellow flavors and smooth the beer while retaining the subtle complexity Kellerbier is known for.
Unlike filtered lagers, Kellerbier is purposely left unfiltered, so you can expect more yeast and protein in suspension, contributing both to its flavor and appearance.
Tips on Achieving the Classic Cloudy Appearance
The hallmark of Kellerbier is its hazy, cloudy look, which comes from being unfiltered and unpasteurized. If you want to recreate that authentic appearance, here are some useful tips:
- Skip filtration: Don’t use a filter before bottling or kegging. Leaving the beer unfiltered preserves yeast and protein particles that create natural haze.
- Minimal fining agents: Avoid heavy fining agents that clear the beer completely. Irish moss during the boil is fine but should be used sparingly if haze is desired.
- Careful handling: Gently rack the beer to avoid disturbing the sediment more than necessary, but some yeast will always remain in suspension.
- Cold temperatures during lagering: Maintain proper cold storage to let the haze mellow naturally without turning into heavy sediment.
Bottling and Conditioning Advice
When your Kellerbier is fully fermented and lagered, it’s time to package it. Proper bottling and conditioning are key to maintaining freshness and the style’s character:
- Sanitize thoroughly: This reduces the risk of contamination and spoilage.
- Use priming sugar cautiously: Kellerbier traditionally is lightly carbonated, so avoid over-priming your bottles. About 2.0 volumes of CO2 or slightly less is perfect.
- Bottle gently: Avoid disturbing the yeast sediment too much when siphoning. A bit of sediment is normal and part of the experience.
- Condition: Store bottles at room temperature for 2-3 weeks to carbonate, then chill before drinking.
Troubleshooting Common Issues
Beginners might encounter some typical challenges while brewing Kellerbier. Here are some tips to troubleshoot common problems:
- Cloudiness isn’t appearing: Ensure you’ve skipped filtration and that your yeast strain produces enough yeast/bravo haze. Some haze might take longer to develop.
- Off-flavors (diacetyl, sulfur): These can come from stressed yeast or fermentation temperatures too high. Keep fermentation stable and do a diacetyl rest at about 60°F (15°C) near the end of primary fermentation.
- Low carbonation: Make sure priming sugar is evenly mixed and your yeast is still viable for bottle conditioning. Warmer conditioning temperatures help carbonation develop.
- Excessive sediment in bottles: This is normal for Kellerbier but avoid rough transfers during bottling.
Savoring Your Homemade Kellerbier
Brewing your own Kellerbier is a rewarding journey that brings historic beer traditions right into your home. The gentle malt sweetness balanced by subtle hop bitterness, combined with the delightful rustic cloudiness, makes it a style perfect for sharing with friends or enjoying on a quiet afternoon.
Remember, patience is a homebrewer’s best friend, especially when brewing lagers. The longer lagering times pay off with a smooth, clean profile that’s refreshingly crisp yet flavorful. Experiment with malt and hop variations as you gain confidence, and you’ll find brewing Kellerbier at home not only enjoyable but a fantastic way to deepen your appreciation of beer artistry.