A Kellerbier is a pretty obscure beer style.
In fact, if you learn about its history and brewing process, it might seem a little…unsanitary.
And that’s because these German lagers are unfiltered and unpasteurized. But that’s not the only weird and interesting thing about this beer.
What Kind of Beer Is Kellerbier?
A Kellerbier is a version or type of German lager from Franconia, Bavaria. To this day, it’s still a favorite summer beer sought mostly in local beer gardens.
Although Kellerbiers are lagers, its brewing process is quite different from most (more about this in the later sections). Some of the key defining characteristics of a Kellerbier include the following:
- Malty
- Unpasteurized
- Unfiltered
- Very yeasty
Is Kellerbier a Lager?
Kellerbiers are German lagers; however, the term “Kellerbier” translates to “Cellar Beer.” This also served as a reference to the cooler temperatures that Kellerbiers were conditioned and brewed under.
In addition, a Kellerbier is also referenced as “Cellar Beer” because as tradition would have it…
You’d drink this German lager straight from a brewery’s lagering tank. Now, how exactly did that come about? And why does tradition dictate it to be this way?
To understand the reasoning behind it, you’ll have to dive a little deeper into a Kellerbier’s history.
Where Does a Kellerbier Come From?
As mentioned earlier, a Kellerbier stretches all the way back to the Middle Ages in Franconia, Bavaria. However, this beer has more to it than its origins.
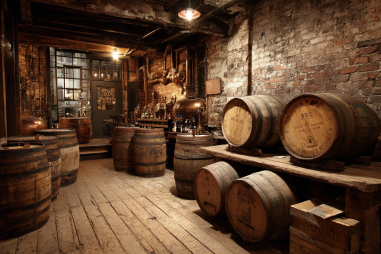
Back then, there was no refrigeration technology available for brewers to store or lager beer in colder temperatures. As a result, Kellerbiers were lagered in caves during the cooler months of the year. In effect, these caves served as a natural way of cooling the beer.
At the same time, this helped maintain the temperature in such a time the beers would mature. Kellerbiers were also unfiltered and unpasteurized as part of the traditional brewing style. Not to mention, these beers – when conditioned – were stored in oak casks except…
The cask’s bunghole was unplugged, so it was left open to the environment. This served as a conditioning technique to allow any CO2 to escape during fermentation. However, this also led to the beer having very little to almost no carbonation.
Now, you might be wondering…were the casks ever sealed completely?
The bungholes in each cask were only sealed during shipping and it was also served from the same cask the beer fermented in. As a result, Kellerbiers had a cloudy appearance due to all the yeast and nutrients that weren’t filtered out.
What Is a Kellerbier Similar to?
There are 2 sub-styles similar to a Kellerbier:
- Zwickelbier
- Zoiglbier
Now, a Zwickelbier is a weaker and less hoppy version of a Kellerbier. In addition, it’s also darker. And lastly, Zwcikelbiers are conditioned differently. Instead of keeping the bunghole open throughout the fermentation process…
The hole is sealed right before fermentation is complete. In effect, Zwickelbiers have more carbonation than Kellerbiers do.
Now, what about a Zoiglbier? It’s easier to tell a Zoiglbier apart from a Kellerbier. However, if placed side-by-side a Zwickelbier, it’s pretty hard to tell what makes them different.
And that’s because a Zoiglbier is also weaker, less hop-forward, and darker in color. It’s even more carbonated than a Kellerbier too. Compared to a Zwickelbier, a Zoiglbier is slightly darker and a little less carbonated.
What Does Kellerbier Taste Like?
It depends on which style of Kellerbier you’re referring to. According to the BJCP Style Guidelines, there are two styles:
- Amber Kellerbier
- Pale Kellerbier
Between the two, an Amber Kellerbier is a closer style to the traditional Kellerbier that was lagered in caves. On the other hand, a Pale Kellerbier is more of a summer beer that’s popular in Bavaria.
Flavor Profile of an Amber Kellerbier
Amber Kellerbiers have a malty sweet taste along with toasted bready notes. Caramel or roastiness is inappropriate in an Amber Kellerbier style.
As for the hoppiness, it ranges from low to medium-high with peppery, herbal, or spicy notes. An Amber Kellerbier should not have a sweet finish either, but rather a medium-dry to dry finish and a bitter edge. In addition, bitterness is moderate to medium-high with an IBU range of 25 to 40.
And finally, low yeasty flavors, such as green apple are acceptable.
Style Guidelines of an Amber Kellerbier
What makes an Amber Kellerbier unique? Its other defining characteristics, such as its appearance, mouthfeel, and aroma.
Although the style is similar to a Pale Kellerbier, that doesn’t mean both are the same. In fact, both have distinct appearances and flavor profiles.
Below, you’ll find its complete style guidelines as set by the BJCP Style Committee:
| Style Guidelines of Amber Kellerbier | Explanation |
| Aroma | Malt aroma is bready, toasty along with bread-crust tones in medium intensity. Any biscuity, caramel, or roasty aromas are inappropriate. As for hop aroma, peppery and spicy notes are noticeable at medium-low to moderate levels. Yeasty notes like green apple and slight diacetyl notes are acceptable. |
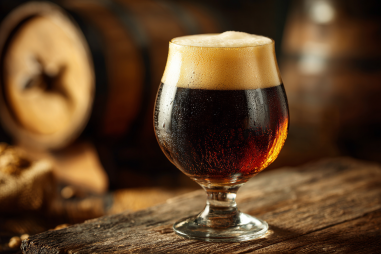
| Appearance | Ranges from a deep golden to reddish amber appearance. The haze mostly depends on the beer’s age and varies from slightly cloudy to clear.
If it’s served from a cask, there will be littler carbonation and not much head. However, the style should still have a creamy small off-white-colored head. |
| Mouthfeel | Medium-bodied with a smooth & creamy texture, but not cloying or too sweet. Carbonation levels range from medium to none. |
| ABV | 4.8% to 5.4% |
Flavor Profile of a Pale Kellerbier
Pale Kellerbiers lean more towards a rounded grainy malty sweetness. Moderate hop bitterness is also welcome in the style with an IBU range of 20 to 35, just slightly lower than an Amber Kellerbier’s.
A low to medium-high floral, spicy, or herbal hop flavor should come after the bitterness. Diacetyl is also acceptable; however, it should be kept at a low to moderate level. Its main role is to balance the beer’s nuanced character.
Like an Amber Kellerbier, light green-apple yeasty notes are also acceptable but not required.
Style Guidelines for a Pale Kellerbier
Apart from its flavor profile, a Pale Kellerbier is also characterized by its aroma, appearance, and mouthfeel.
Below, you’ll learn its other defining qualities:
| Style Guidelines of Pale Kellerbier | Explanation |
| Aroma | A Pale Kellerbier has a clean malty and sweet cereal aroma. It’s possible for the aroma to have low yeasty notes like green apple along with low notes of diacetyl. Hop aroma is also present with spicy, herbal, or floral notes. |
| Appearance | Hazy pale yellow to light golden appearance. Haziness is acceptable, but it should not be murky. For the head, it should be creamy white with good retention. |
| Mouthfeel | Carbonation ranges from low to medium levels and also depends if the beer is served from a cask. A Pale Kellerbier is also medium-bodied and has a creamy mouthfeel. |
| ABV | 4.7% to 5.4% |
How to Brew Kellerbier
For the process shown below, this will lean towards brewing an Amber Kellerbier.
The trick to brewing this style is to ensure you get a rich malty character in your beer. That includes achieving an amber color without any roasted or caramel-like flavors in your lager.
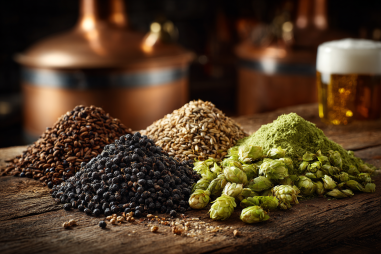
Mostly, a good malt base to start with is Vienna and Pilsner malt with a ratio of 2:1, respectively. This should give you that bready and rich malty character without any roasty notes. Take note, though, that going above the 2:1 ratio for your Vienna and Pilsner malt leads to your beer tasting too sweet.
You’re also welcome to add Carafa II and melanoidin malt as part of your grain bill. How much should you add? About 3 oz. (85 g) of each is sufficient. What these malts do is add color to your beer without imparting roasty notes. In addition, they also deepen your beer’s flavor without any caramel-like flavors in your finished result.
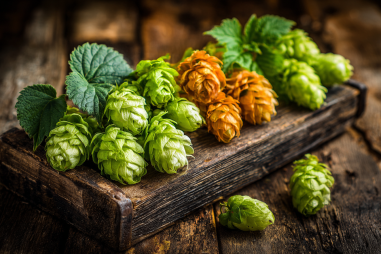
Now, your hops.
An Amber Kellerbier has an IBU range of 25 to 40, so that means it’s moderately bitter. Not to mention, hop aroma and flavor are at moderate levels. German Noble hop varieties go well with this style. What’s important to remember is when to add your hops.
You can add 1 oz. (28 g) of each hop during the 60-minute kettle boil then another 1 oz. (28 g) at 30 minutes. Finally, you can add 1 oz. (28 g) again with 10 minutes left in the boil. Overall, this should give your beer that nice 35 IBU range along with moderate hop flavors and aromas.
Finally, go with a lager yeast strain for this style. Specifically, Wyeast 2206 Bavarian Lager is an excellent yeast option when brewing an Amber Kellerbier.
A single-infusion mash at a temperature of 152°F (67°C) should also be enough. However, some recipes may use a decoction or step mash (more about this in the later section).
Last but not least, always make sure to pitch a healthy yeast starter. A good fermentation temperature to start with is 50°F (10°C) for the first 5 days. Then, gradually raise the temperature and aim for a final gravity of 1.011.
Kellerbier Recipe
Most recipes online lean towards a Pale Kellerbier seeing as how the result is mostly a pale golden beer.
The recipe shown below, taken from BYO, you can use as a first-time homebrewer. If you’re still learning the basics of homebrewing, this Kellerbier is an easy step-by-step guide to follow.
For your malt, you’ll use the following:
- 7.75 lbs. (3.5 kg) Pilsner malt
- 1.2 lbs. (544 g) Vienna malt
- 1.2 lbs. (544 g) Bestmalz Caramel Pils malt (2 °L)
- 7 oz. (198 g) Biscuit malt
Take note that your Pilsner and Vienna malts should be of German origin.
For your hops, Perle and Saaz are great options.
- 2 oz. (5.7 g) Perle hops – first wort hop
- 0.4 oz (11 g) Perle hops – added at 80 minutes
- 0.4 oz. (11 g) Saaz hops – added at 0 minutes
As mentioned earlier, Wyeast 2206 Bavarian Lager yeast is a great option. However, you can also use the following yeast strains for this recipe:
- SafLager W34/70
- Wyeast 2124 Bohemian Lager
- WLP830 White Labs German Lager yeast
And finally, for priming, 3/4 cup (96 g) of corn sugar should be good.
Brewing Recipe Process
Before mashing, make sure you’ve adjusted your water profile accordingly too. Preferably, reverse osmosis is best for this. Aim for a pH of 5.5, which you can adjust using phosphoric acid.
- Mash all your malts at a temperature of 126°F (52°C) for 10 minutes
- Raise the temperature to 145°F (63°C)
- Mash for 40 minutes
- Raise the mash temperature to 162°F (72°C)
- Mash for 20 minutes
- Raise mash temperature again to 172°F (78°C). Maintain for 10 minutes then mash out
- Add first wort hops (0.2 oz. / 6 g Perle hops) to your kettle
- Sparge and collect as much wort – preferably 6.5 gallons or 24.5 Liters of wort
- Boil your wort for 90 minutes
- Add 0.4 oz. (11 g) Perle hops at 80 minutes
- Add 0.4 oz. (11 g) Saaz hops at 0 minutes
- Chill your wort to 48°F (9°C)
- Pitch your yeast
- Start fermentation. This should take about 2 weeks
- After fermentation, cool to 36°F (2°C)
- Lager your beer at the same temperature for 5 weeks – 36°F (2°C)
- Rack beer to a secondary fermenter
- Prime your beer and proceed to bottle conditioning. Alternatively, you can keg your beer and force carbonate
Tips to Remember When Brewing a Kellerbier
As far as malt options go, a Pale Kellerbier works well with just German Pilsner malt. In fact, using 100% German Pilsner malt is totally fine when brewing a Pale Kellerbier.
Then again, you can also add Carafoam malt to enhance your beer’s body. For an Amber Kellerbier, most would recommend German Pilsner and Munich malt. However, this might add some sweetness to your beer if you’re not careful.
That said, you can experiment and try either light or dark Munich malts to see the flavor it creates in your beer. Just be careful when using Munich malts above 20°L Lovibond.
When it comes to hops, for the most part, you’re free to play around with German Noble hop varieties. After all, as a homebrewer, it’s all part of the process to see how different varieties affect your beer’s hop flavor and aroma.
Examples of German Noble hop varieties include the following:
- Saaz
- Spalt
- Tettnang
- Hersbrucker
- Hallertauer
A good way to go about your hop additions is to use 1 hop bittering addition and 1 hop for flavor or aroma purposes.
Mashing Tips
As mentioned in the previous section, you’re free to choose between a step mash or a single-infusion mash. However, most German beers will have a higher protein content. And what that means is…
A step mash can help degrade more of the protein. In effect, this prevents the protein from settling or filtering out of your trub during the kettle boil.
If you’ve noticed in the recipe above, BYO did a 3-step mash which is the recommended practice if…
You want to follow the same brewing style. Generally, here are a couple of guidelines to follow for the 3-step mash when brewing a Kellerbier:
- The first mash is kept at a temperature of 122°F (50°C) for a protein rest. This should help keep your mash as thick as possible. During this stage, it’s good to maintain this temperature for 20 to 30 minutes.
- The second step of your mash is to raise the temperature to about 145 to 148°F (62.8 to 64.4°C). Raising the temperature allows beta saccharification to take place. As a result, this thins your mash and allows the enzymes in your grains to work better. Maintain this temperature for 15 minutes.
- The final step of the mash is raising the temperature once again to 153 to 156°F (67.2 to 68.9°C). Finally, you should maintain this temperature for about 15 minutes then mash out at 170°F (76.7°C). This should also be your temperature while sparging.
Should You Condition Kellerbiers in Oak Casks?
This isn’t exactly feasible for a homebrewer. However, a good workaround solution for this is to use oak chips. A good ratio to start with is 2 cups of oak chips for every 5-gallon batch of beer.
Now, how does this work exactly?
You can go about this in 2 ways:
- Place the oak chips directly in your fermenter
- Make tea using the oak chips, then add them to your fermenter
If you want, you can toast your oak chips in an oven for about 30 minutes to 1 hour before adding them to your fermenter.
Alternatively, if you choose to go with the tea route, place your oak chips in a jar then add near-boiling water. After, seal the jar and let the chips steep in water. Once the water has cooled down, transfer the jar to your fridge and add it to your fermenter before fermenting.
Take note, though.
Conditioning your beer with oak chips isn’t necessary. Think of it more like an experimental process. It may be best to brew a clean batch first without any experimental additions. This will serve as your benchmark. Then, you can brew another batch and add any experimental elements to the brewing process.
Fermentation for Kellerbier
One thing to always remember is to use healthy yeast. That means pitching a yeast starter is a must whenever you brew beer.
As for lager yeast strains, temperature control also matters. Thankfully, you have a wide temperature range available to you, specifically from 38°F to 62°F (3.3°C to 16.7°C). Take note that lager yeast strains are bottom-fermented.
Put simply, that means the yeast strains when brewing lagers should be done at cooler temperatures. You can use your refrigerator if you’re brewing a small batch size. However, a dedicated beer refrigerator works best. Alternatively, an ice bath may work but be sure to maintain the temperature as much as possible.
For a Kellerbier, fermentation can last between 2 to 4 weeks. This also depends on the final gravity you aim to reach. After fermentation, when brewing lagers, a diacetyl rest is always crucial.
So, in this case, raising the temperature to about 60°F (15.6°C) and maintaining it for 2 days should be enough. However, in some cases, this may extend to 3 days. Finally, lagering and conditioning a Kellerbier can take between 2 to 5 months at a temperature of about 50°F (10°C).
However, you don’t always have to lager it this long. According to BYO’s recipe mentioned above, the lagering period takes about 5 weeks so, it’s also up to you how long you intend to lager it.
How to Serve a Kellerbier
This depends on whether you’re serving an Amber or Pale Kellerbier as both have different serving temperatures.
For a Pale Kellerbier, the recommended serving temperature is 45 to 50°F (7.2 to 10°C). The best serving glass to use for a Pale-style Kellerbier is an Earthenware mug or traditional German Stein.
Now, what about an Amber Kellerbier? Its serving temperature is slightly higher. It’s best served at a temperature between 50 to 55°F (10 to 12.8°C).
Just like a Pale Kellebier, Amber Kellerbiers are also best served with either a traditional German Stein or Earthenware mug.
What Food Pairs Well With a Kellerbier?
Food that pairs well with an Amber Kellerbier is quite similar to what you’d pair with an Oktoberfest beer. Because Amber Kellerbiers have a rich malty backbone and moderate hoppiness, it pairs well with meat, such as:
- Venison
- Charbroiled steak
- Sausage
- Shish-Kebabs
Grilled vegetables also go well with this style. Not to mention, cheese always has a place when it comes to beer food pairings. Specifically, go with Jalapeno Jack cheese. You won’t regret it. And finally, if you still have room for dessert, go for anything that has a nutty or even coconut-like flavor.
What about a Pale Kellerbier? Because it leans more toward a grainy malty sweetness, white meat will pair better. Think of a chicken sandwich with cilantro. If that’s not your thing, go with roast chicken. Any Mexican, Thai, Indian, and Tex-Mex food dishes also go great with Pale Kellerbiers.
Of course, this food pairing list wouldn’t be complete without seafood. Shrimp, scallops, and oysters are all great picks. As for your cheese options, sharp cheddar and Gruyere are excellent choices. Last but not least, go with rice pudding as a fave dessert food pairing option.