Brewing your first Schwarzbier, a smooth and dark German lager, can be an exciting and rewarding endeavor for any beginner homebrewer. Known for its deep color and surprisingly light body with a subtle roasted malt character, Schwarzbier is approachable yet flavorful, making it an ideal style to try when stepping into the world of dark lagers. With the right equipment, ingredients, and techniques, you’ll soon be enjoying your very own batch of this classic brew. Let’s dive into some essential tips and guidance to help you start your Schwarzbier brewing journey with confidence.
Getting to Know Schwarzbier: An Introduction for New Brewers
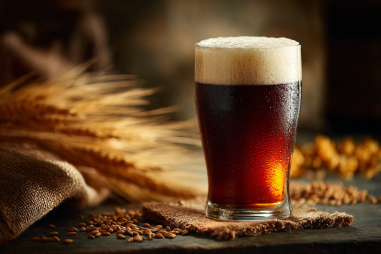
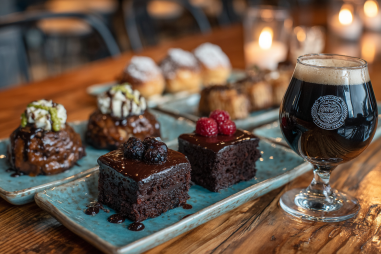
Before you begin brewing, it’s helpful to understand what makes Schwarzbier unique. The name “Schwarzbier” literally means “black beer” in German, and it hails from the Franconia region of Germany. Unlike heavier stouts or porters, Schwarzbier has a relatively light body and moderate bitterness with subtle roasted malt flavors reminiscent of coffee or dark chocolate, but without overpowering heaviness. It typically has an alcohol by volume (ABV) ranging from 4.5% to 5.5%, making it an easy-drinking lager.
Since Schwarzbier is a lager, it requires fermentation with lager yeast strains at cooler temperatures than ales, which might seem intimidating at first, but with the right approach, it’s entirely manageable for beginners. Its smooth flavor profile and balanced finish make it a great style to practice mash control and fermentation techniques while developing your brewing skills.
Essential Equipment for Brewing Schwarzbier at Home
Starting with appropriate equipment is key to successfully brewing Schwarzbier or any beer style. Here are the basics you’ll need:
- Brew kettle: At least 5 gallons capacity to handle boil and wort volume.
- Fermenter: Food-grade plastic bucket or glass carboy equipped with a fermentation lock.
- Cooling system: An immersion wort chiller or ice bath to quickly cool boiled wort.
- Hydrometer or refractometer: To measure original and final gravity for monitoring fermentation progress.
- Thermometer: To maintain precise mash and fermentation temperatures.
- Siphon and bottling equipment: For transferring the beer and packaging it when fermentation is complete.
- Sanitizer: Such as Star San to keep all your equipment clean and avoid contamination.
While professional brewers may use more specialized equipment, beginners can successfully brew Schwarzbier with this setup, ensuring control over the crucial brewing steps.
Choosing the Right Ingredients for an Authentic Schwarzbier
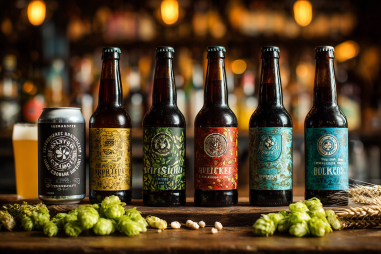
The flavor of your Schwarzbier depends largely on ingredient selection. While recipes can vary, here’s what you should look for:
- Malt: Use a base malt such as Pilsner malt to provide a clean fermentation profile. Complement this with CaraMunich or other caramel malts for color and subtle sweetness. The dark color primarily comes from roasted barley or chocolate malt, which should be added carefully to avoid overpowering bitterness.
- Hops: Traditional German noble hops like Hallertau, Tettnang, or Saaz are excellent choices, employed sparingly since Schwarzbier tends to be moderately hopped with mild bitterness and aroma.
- Yeast: A quality lager yeast strain like Wyeast 2308 Munich Lager or White Labs WLP830 German Lager yeast works well, producing clean fermentation and smooth flavors.
- Water: Use clean, good-quality water with balanced minerals. If your tap water is heavily chlorinated or hard, consider using filtered or bottled water.
Using fresh and high-quality ingredients will help you craft a Schwarzbier with that signature smoothness and well-rounded dark malt character.
A Simplified Step-by-Step Brewing Process for Your First Batch
Let’s walk through the basic brewing steps tailored for a Schwarzbier, broken down to streamline the process for beginners:
- Mashing: Heat water to around 152°F (67°C) and steep your grains—Pilsner malt, CaraMunich, and roasted barley—in the water for 60 minutes. Maintaining this temperature helps convert starches to fermentable sugars.
- Sparging: Gently rinse the grains with hot water (~170°F) to extract remaining sugars without extracting unwanted tannins.
- Boiling: Bring the wort to a vigorous boil for 60 minutes, adding hops according to your recipe—usually a small bittering addition at the start and a flavor/aroma addition later.
- Cooling: Quickly cool the wort to fermentation temperature (around 50°F-55°F) using a wort chiller or ice bath. Rapid cooling prevents off-flavors.
- Pitching yeast: Once wort is cooled, transfer it to your fermenter and pitch the lager yeast.
- Fermentation: Maintain fermentation temperatures between 48–55°F for about two weeks. This slow, cool process is how lagers develop clean flavors and carbonation.
- Lagering: After primary fermentation, lower temperatures to around 35°F and lager the beer for 4-6 weeks to clarify and round out the flavor.
This step-by-step provides a straightforward framework for brewing Schwarzbier. Careful temperature control and sanitation at every stage are critical to success.
Common Mistakes Beginners Make and How to Avoid Them
As a first-time Schwarzbier brewer, you might run into some challenges along the way. Here’s what to watch out for:
- Temperature mismanagement: Fermenting lager yeast too warm can produce unwanted fruity esters or stale flavors. Invest in a temperature controller or find a cool spot in your home during fermentation.
- Over-roasting malts: Using too much roasted malt or dark malts will create excessive bitterness or burnt flavors. Stick to recommended recipe percentages (usually less than 5-7% of total grain bill).
- Insufficient chilling: Slow chilling of wort increases risk of contamination and off-flavors. Chill as fast as your equipment allows.
- Poor sanitation: Any contamination can cause sour or funky flavors. Always sanitize fermenters, lids, and any tools coming in contact with wort or beer.
- Rushing the lagering process: Schwarzbier benefits from extended cold conditioning that smooths the beer’s profile. Avoid rushing to packaging too early.
Being mindful of these pitfalls will help you produce a clean, balanced Schwarzbier even on your first attempt.
Mastering Fermentation and Conditioning
Fermentation is the heart of lager brewing, and Schwarzbier relies on a cool, slow fermentation for clarity and flavor.
- Temperature control: Maintain steady fermentation temps of 48-55°F (9-13°C). Using a dedicated fermentation fridge with a temperature controller is ideal, but a cool basement or insulated box may suffice.
- Extended lagering: After primary fermentation completes, drop temperatures to 35°F (2°C) for 4-6 weeks. This maturation phase clarifies the beer and smooths harsh flavors.
- Patience is key: Lager yeast works slowly, so don’t be tempted to rush or raise the temperature prematurely.
Proper fermentation and conditioning ensure your Schwarzbier achieves the characteristic silky mouthfeel and balanced malt profile.
Packaging and Storing Your Schwarzbier
Once conditioning is complete, it’s time to package your beer:
- Bottling: Use sanitized bottles and add priming sugar to carbonate your Schwarzbier naturally. Aim for moderate carbonation so it complements the smooth nature of the beer.
- Kegging: If you keg, naturally carbonate or force carbonate and store the keg cold to retain freshness.
- Storage: Store your Schwarzbier in a cool, dark place to protect flavor. Refrigeration is best after carbonation.
- Serving: Serve Schwarzbier between 45-50°F (7-10°C) in a tulip or lager glass to showcase its color and aroma.
Proper packaging and storage preserve your labor’s efforts and deliver the best tasting Schwarzbier.
Enjoying the Fruits of Your Labor
Brewing Schwarzbier for the first time is a fantastic experience that combines science, art, and patience. By starting with quality ingredients, maintaining precise temperature control, and following good brewing practices, you’ll create a beer that’s smooth, flavorful, and satisfying. Whether sharing with friends or savoring on your own, pouring a glass of your homemade Schwarzbier is a memorable reward for your hard work. So sanitize your equipment, get your grains ready, and brew with confidence—your perfect dark lager awaits!