Winter warmers are a cozy category of beer that bring together rich malt flavors, warming alcohol content, and aromatic spices that make the cold months more enjoyable. Brewing your own winter warmer at home can be incredibly rewarding, especially when you get to sip a perfectly balanced, homemade beer by the fire. Whether you’re a seasoned homebrewer or just venturing into seasonal brewing, these winter warmer beer brewing tips will guide you through the essential steps to craft a drinkable, flavorful brew that’s perfect for the chillier weather.
Essential Equipment for Winter Warmer Brewing
Before diving into recipes or ingredient shopping, it’s crucial to ensure you have the right equipment. Winter warmers often involve higher gravity wort due to increased malt and sugar content, which means you might need some equipment that can handle the added stress and volume.
Basic equipment includes:
- A large brew kettle with at least a 5-gallon capacity to accommodate wort expansion during boiling.
- An accurate hydrometer or refractometer for measuring specific gravity, which helps monitor fermentation progress, especially important for higher alcohol content beers.
- Fermentation vessels such as carboys or fermenters with airlocks to maintain a sterile environment and allow CO2 to escape.
- Temperature control tools, including a reliable fermentation chamber or temperature-controlled space, are vital since winter warmers often require stable fermentation temperatures for optimal flavor development.
- Bottling or kegging equipment for packaging the finished beer.
Remember that cleanliness and sanitation are paramount for any brewing session, but especially with complex brews like winter warmers that take longer to ferment and age.
Ingredient Selection and Sourcing
Choosing quality ingredients is foundational to crafting an excellent winter warmer. Because these beers rely on strong malt and spice profiles, you want fresh and robust sources for every element.
Start by scouting local homebrew shops or reputable online suppliers who specialize in malt, hops, yeast, and spices. Bulk buying can save money, especially with the larger malt bills winter warmers require. Additionally, consider ingredients that contribute depth and complexity, such as specialty malts or unique spices. Don’t be afraid to plan ahead and order hard-to-find spices early to avoid delays.
When dealing with spices and adjuncts, always check for freshness and potency since these can diminish over time and affect the overall aroma and flavor profile.
Choosing the Right Malts and Spices
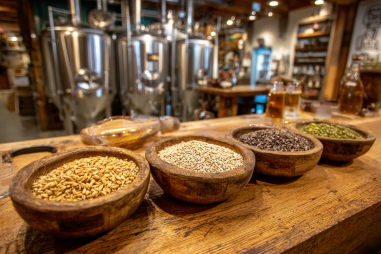
The malt backbone of your winter warmer beer provides the richness and sweetness needed to balance the higher alcohol and spice additions. Here’s how to approach this critical step:
- Malts: Use a combination of base malts like Maris Otter or Pilsner malt to form a solid foundation, then incorporate specialty malts such as caramel/crystal malts, Munich, or biscuit malt to add layers of sweetness, toastiness, and complexity.
- Roasted Malts: Consider a touch of roasted malts or chocolate malt for subtle dark notes and color depth.
- Spices and Flavorings: Traditional winter warmer spices include cinnamon sticks, nutmeg, cloves, allspice, star anise, and orange peel. Use these sparingly and balance their addition times—some during the boil, some during secondary fermentation—to achieve well-rounded spice profiles.
Experimenting with ingredients like vanilla beans, ginger, or even dried fruits can also add interesting twists to your brew, but always keep the spice balance in mind to avoid overpowering the malt character.
Fermentation Tips for Winter Warmers
Winter warmers usually have a higher original gravity (OG) due to the increased malt and sugar content, so fermentation requires careful attention:
- Choose the right yeast: Use a robust ale yeast strain capable of handling higher alcohol levels without producing off-flavors. English ale yeasts often work well, as they complement malt richness and spice complexity.
- Temperature control: Maintain steady fermentation temperatures within the yeast’s optimal range, usually between 65°F and 72°F (18°C–22°C). Avoid temperature swings that can create harsh esters or fusel alcohols.
- Oxygenate the wort: Proper aeration before pitching yeast is essential to help the yeast thrive, especially since alcohol tolerance requirements are higher.
- Allow extended fermentation and conditioning: Winter warmers benefit from longer maturation periods, sometimes weeks or months, to allow flavors to meld and smooth out rough edges.
Patience is a virtue here—rushing fermentation or bottling can result in harsh, unbalanced flavors.
Adjusting Alcohol Levels and Body
Winter warmers typically have a warming alcohol content ranging from 6% to 10% ABV, contributing to their comforting nature. Adjusting alcohol levels and body can greatly affect drinkability and perceived warmth:
- Gravity adjustments: Use additional malt extract or fermentable sugars like honey, molasses, or brown sugar to boost gravity and therefore ABV.
- Balancing body: Adding dextrins or using specialty malts can give the beer a fuller mouthfeel to match higher alcohol.
- Alcohol warmth: A higher ABV contributes to “warming” sensations, but it’s important to balance this with malt sweetness and spice so the alcohol doesn’t overpower.
Carefully plan your recipe and wort gravity measurements to avoid creating a beer that’s overly alcoholic or too thin in body.
Common Mistakes to Avoid
Even experienced brewers can slip up when crafting a winter warmer. Keep these common pitfalls in mind:
- Over-spicing: Excessive spice can rapidly overwhelm malt flavors. Always add spices gradually and taste when possible.
- Insufficient yeast pitching: Under-pitching yeast for high gravity worts can cause stuck fermentation or off-flavors.
- Poor temperature control: Fermenting too warm or too cold can ruin subtle flavor profiles in complex winter warmers.
- Ignoring conditioning time: Not allowing enough maturation time will leave your beer harsh and unbalanced.
Addressing these issues proactively ensures your winter warmer is smooth, enticing, and satisfying.
Packaging and Serving Suggestions
Packaging your winter warmer properly helps retain freshness and flavor. Most brewers opt to bottle-condition the beer, allowing natural carbonation to develop, which also helps integrate spice and malt flavors over time. Alternatively, kegging is efficient and provides easy control over serving temperatures and carbonation levels.
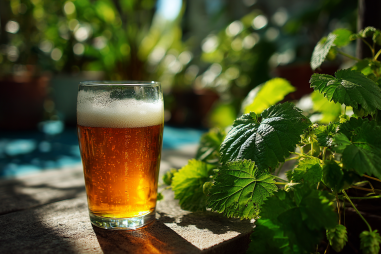
When serving your winter warmer:
- Use glassware that showcases the beer’s deep color and helps concentrate aromatics, such as tulip or snifter glasses.
- Serve slightly warmer than typical ales, around 50°F to 55°F (10°C to 13°C), which enhances the malt sweetness and spice aroma.
- Pair the beer with hearty winter fare like stews, roasted meats, and spiced desserts to complement its flavor profile.
Slowly savor your creation by the fire or during cozy gatherings, and don’t hesitate to share your brewing journey with fellow enthusiasts.
Brewing the perfect winter warmer beer at home is a gratifying challenge that combines technical skill with creativity. From selecting the right malts and spices to managing fermentation and packaging, each step shapes a brew that warms both body and soul. With patience, attention to detail, and these expert tips in hand, you can craft a seasonal brew that stands out on any chilly evening.