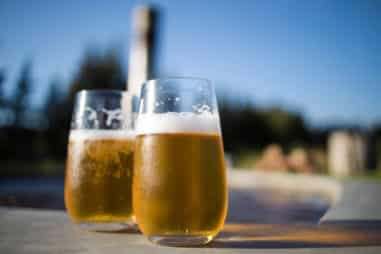
What the hell? Where did my haze go?!
Why is my NEIPA dark?
Why does my NEIPA taste tarty?
No juiciness? Faint fruitiness? Did you check your water profile? Oh, shoot. What’s that again?
Don’t panic. This NEIPA brewing guide is the express train to help you make a killer NEIPA. And it’s not even going to take you 10 minutes to finish reading.
How Long Does It Take to Brew a NEIPA?
If you’re talking about the end of fermentation or once fermentation is completed, it’s about 10 to 12 days. But when you include cold conditioning and cold crashing, this adds another 8 to 10 days.
Overall, you’re looking at a total brewing time of 20 to 23 days.
How Do You Get the Haze in NEIPA?
Even if you flunked chemistry, you’ll still be able to understand the haziness in beer.
Haze is simply a chemical reaction caused by proteins, hops (specifically polyphenols), and yeast. Although, yeast doesn’t contribute to the haziness of a NEIPA as much as your proteins and polyphenols.
Here’s a quick little science tour on how this works.
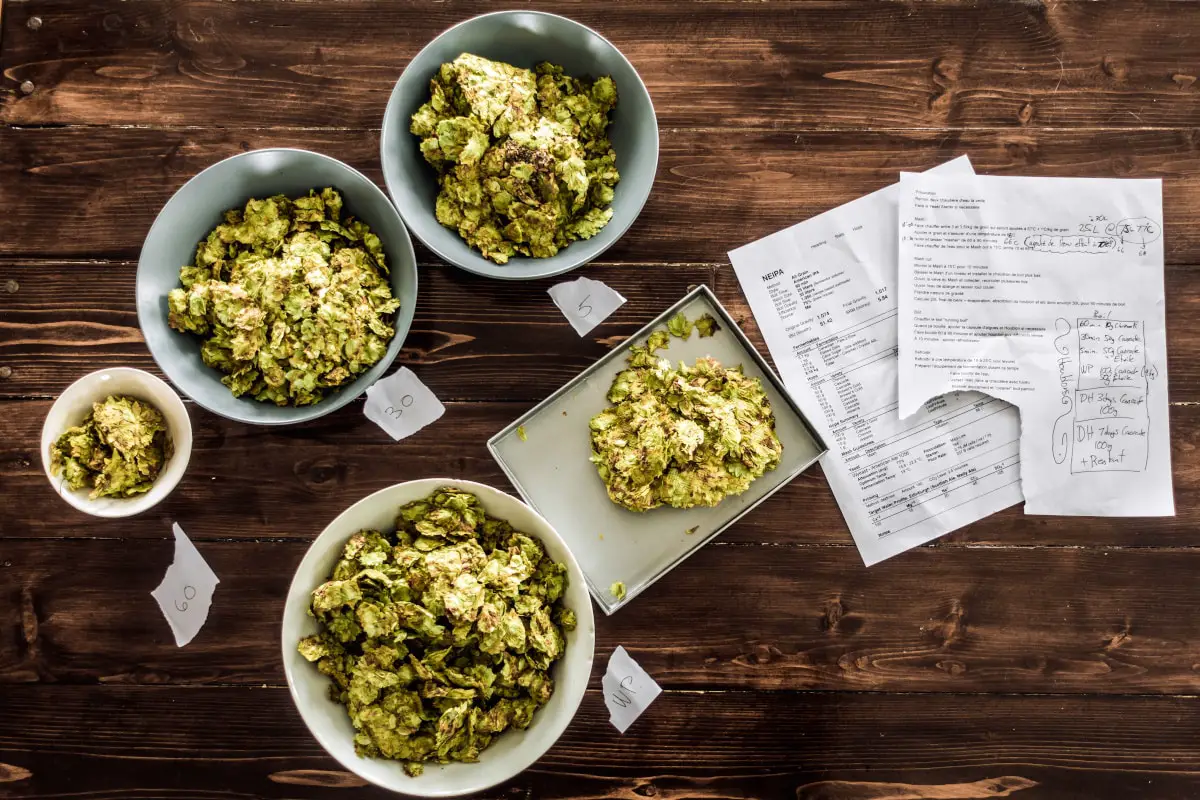
Proteins come from high-protein grains, such as wheat and oats. Polyphenols are hop oils found in your hops that are released during dry hopping.
In case you forgot what dry hopping is, it’s basically adding your hops during or after fermentation.
When the polyphenols and protein found in your grains bond, this polyphenol-protein bond is referred to as colloidal haze.
The colloidal haze is what results in the haziness you see in a NEIPA. In other words, to get the haze in a NEIPA, you need to add a massive amount of hops and high-protein grains. Some examples of high-protein grains include flaked wheat, flaked oats, Golden Naked oats, and white wheat.
How Do You Keep the NEIPA Hazy?
It’s one thing to create haze. It’s another to keep the haze stable. Haze stability is the answer you’re looking for if you brewed a NEIPA but the haze suddenly turned clear.
To achieve a stable haze, follow these 5 tips:
| Tips to Keep Your NEIPA Hazy | Explanation |
| Keep your mash pH in the ideal range | This usually ranges between 5.2 to 5.4. By keeping your mash pH in its ideal range, more of the protein remains in your wort solution. It’s crucial for the protein from your grains to stay. Why? So that when your hops are added, the polyphenols can bond to the proteins. |
| Don’t stress your yeast | Stressed yeast leads to a loss of protein in your wort. Storing yeast for too long, providing inadequate oxygen, and storing it in warm temperatures will stress your yeast.
When yeast is stressed, it breaks down the protein in your wort. You already know what happens when there’s too little protein, right? |
| Use the right hop variety | The hops used to make a West Coast IPA should not be the same hops used in a NEIPA. If you want a fruity and juicy NEIPA, then only choose fruity and tropical hop varieties. Some of these include Citra, Mosaic, and Galaxy. |
| Oomph up your protein | High-protein grains are perhaps the most significant cause of haze. And that means using a high amount of wheat and oats is crucial to achieving a stable haze. |
| Consistency matters | Consistency means making sure your equipment is clean throughout the entire brewing process. That includes ensuring your yeast has good viability and not introducing oxygen once you’ve pitched your yeast in the fermenter.
Don’t just pop the lid off of your fermenter and add your dry hops. Open the lid, purge CO2, then add your dry hops. This prevents oxidation from happening and your NEIPA from turning dark. |
How Much Flaked Oats in a NEIPA?
Here’s something you don’t hear every day: Go wild with your oats and wheat.
But not literally FOMO style. What a lot won’t tell you is that you can actually have a grain bill as high as 40% in a NEIPA.
Outrageous? Try it for yourself. This is one of the biggest mistakes brewers make. 10% isn’t going to do much. It’s not going to give you that Instagram-worthy haze.
Try 20% to 25% of oats and 8% to 10% wheat. Remember: high-protein grains are a must when brewing a NEIPA.
What Temperature to Mash the NEIPA?
Mash temperature influences the finish of your NEIPA. If you mash at a temperature lower than what’s ideal, you get a dry & crisp finish.
Now, does dry sound like a great NEIPA? No, it doesn’t. The temperature you should aim for is 154°F (68°C) to 156°F (69°C). This will give your NEIPA a sweeter and softer finish.
If you want to go a little lower like 153°F (67°C), that’s perfectly fine too.
What Hops Are Used in NEIPA?
Always lean towards fruity and tropical hop varieties when brewing a NEIPA. Don’t go for a bittering hop like Chinook.
Didn’t you get the memo? NEIPAs are juicy. They don’t have that strong bitter kick as a West Coast or American IPA.
Quite frankly, you don’t even need to add any bittering hops during the kettle boil. If you want to, go right ahead. However, that’s not exactly a NEIPA once you do that.
For a fruity, juicy, and tropical flavor & aroma, you can’t go wrong with Galaxy, Mosaic, and Citra. These are great starter hops for first-time NEIPA homebrewers.
Of course, you aren’t solely limited to these varieties. Other fruity and tropical varieties include:
- Ella
- Idaho 7
- Nelson Sauvin
- El Dorado
- Riwaka
- Centennial
- Motueka
How Many Hops Does a NEIPA Have?
For every 5 gallons (19 L) of beer, you should add 3 to 5 ounces (85 to 142 g) of hops. Take note, these don’t mean during the kettle boil.
Adding your hops usually starts during whirlpool hopping. Whirlpool hopping is the process of adding hops after the kettle boil.
At the end of the boil, once you’ve turned off the kettle, you add in your hops. For a NEIPA, whirlpool hopping shouldn’t last too long. A good 20 to 30 mins is recommended.
As for the temperature, a good whirlpool temperature is 170°F (77°C). Some say that you can go higher than 170°F. However, you don’t want to go too high because you’ll extract excess bitterness. You also shouldn’t go lower than 170°F. If you want to go lower than 170°F, you’re better off saving your hops for dry hopping.
You might be wondering, is a NEIPA completely free of bitterness? Not quite. Some bitterness is extracted during whirlpool hopping. But you also don’t want your NEIPA to have a bitterness that overpowers the fruitiness, right? That’s why the temperature and time you spend on whirlpool hopping are critical.
What Water Profile to Use for NEIPA?
Always pay attention to your chloride-to-sulfate ratio. The more sulfate in your water profile, the more bitter it will taste.
A good chloride to sulfate ratio for brewing a NEIPA is 2:1. Start with 200 ppm chloride and 100 ppm sulfate. This will add more sweetness and enhance the silky mouthfeel of your NEIPA.
For your mash pH, aim for 5.3 to 5.4. If your mash pH is too high, you’ll extract extra tannins that will make your NEIPA taste bad.
Other minerals include sodium, magnesium, and calcium. Calcium and magnesium are important for yeast health. Both also determine how hard your water is.
Basically, the harder your water is, the more enhanced yeast flocculation is too. A good level to start with for calcium is 80 ppm. Generally, keep it below 150 ppm. Some recipes go as high as 120 ppm.
5 to 7 ppm magnesium is also good for a NEIPA. And finally, sodium, which helps round out all the malt flavors. Adding too much sodium will make your beer taste salty.
There’s nothing wrong with that, but generally, 20 to 30 ppm is a good starting point. If all this sounds overwhelming, you can use software to help you with your mineral additions and water profile.
Bru’n Water and BrewFather are 2 great options. Using software helps you calculate precise mineral additions. The best part? You don’t have to worry about doing the calculations!
What Brewing Salts Can I Use?
It’s a good idea to use distilled or reverse osmosis (RO) water so you can have a clean start. This way, you can add the minerals and tweak the ideal water profile for a NEIPA.
If you plan to use regular tap water, you’ll need a test kit and some Campden tablets to treat your water. Campden tablets are useful for treating chloramine or chlorine. These are 2 minerals you don’t want in your beer.
That said, here is a list of brewing salts to help you adjust your water profile:
- Gypsum or calcium sulfate: Slightly lowers your mash pH and increases sulfates and calcium
- Epsom salt or magnesium sulfate: Increases sulfates and magnesium (be sure to get food-grade variety Epsom salt)
- Calcium chloride: Increases chloride and calcium. It also slightly lowers your mash pH
- Table salt (non-iodized): Useful for…increasing sodium (obviously, right?)
- Lactic acid: Decreases mash pH
- Baking soda: Increases mash pH and alkalinity
- Campden tablets: Also known as potassium metabisulphite, which is used to treat chloramine and chlorine in your water. 500mg should be enough
How to Add Brewing Salts
It’s best to add all your brewing salts to your water before mashing. This way, you can adjust your water profile before any chemical reaction takes place.
Don’t forget to test your mash pH 15 too. Use a digital pH meter to test the pH and make sure you’ve hit your target mash pH.
Finally, all the brewing salts mentioned above have no issues dissolving in water except calcium chloride. You need to stir vigorously to completely dissolve all your brewing salts.
How Do You Ferment NEIPA?
It all starts with yeast selection.
Yeast is a game-changer. If you brewed the exact same recipe twice but used a different yeast strain for each recipe, you’d get two different beers.
Don’t worry. This isn’t going to turn into another science lesson. All you need to remember is that choosing the right yeast strain matters.
For a NEIPA, it’s always best to start with Wyeast London Ale III (1318). Why this strain? Because it packs a tropical, fruity punch. After all, your yeast should at least complement your hop variety.
But what if you’re a daredevil who wants to use a strain that deviates from the norm? Now is not the time, bud. If it’s your first time brewing a NEIPA, pick one yeast strain and stick to it. For now.
While using that same strain, tweak other elements so you can determine what’s working and what’s wrecking your NEIPA.
After your fair share of success and failures, go ahead and try these other yeast strains:
- Imperial Yeast Dry Hop (A24)
- Imperial Yeast Juice (A38)
- Wyeast British Ale (1098)
- White Labs Saccharomyces “Bruxellensis” Trois (WLP644)
Preferably, start with Wyeast London Ale III (1318). Then, move your way up by trying new strains later on.
Finally, don’t ever forget to make a yeast starter. If you don’t want to go through all that trouble, pitch 2 packs of liquid yeast. However, making a yeast starter isn’t difficult. It pays to learn the basics. Even once.
How Long Should a NEIPA Ferment?
This is where it gets a little tricky. Some say fermentation should last for 2 weeks, while others say it’s better to do it for 3 weeks. And finally, some will also say fermentation should take roughly 10 days to complete.
Which is the best answer? It’s a little bit of everything.
But before you skip this part and start Googling “how long to ferment NEIPA,” here’s an explanation.
How Long Is the Primary Fermentation in NEIPA?
First, there is a risk of fermenting for too long.
For one, there’s a higher chance of introducing oxygen, which leads to oxidation. In short, ferment for too long and you run the risk of making a bad NEIPA.
Second, if fermentation lasts for 8 to 10 days, this is a safe method. However, if you’ve tried Juicy Bits (NEIPA brewed by WeldWerks) and found it delicious, well…
Their fermentation timeline is 2 weeks. And that’s not even the end yet. There’s still 1 week of cold conditioning.
So where does that leave you? 10 days or 2 weeks? Truth be told, fermenting for too long means a 3-week fermentation period. And although 10 days is safer, there’s no guarantee you’ll extract all the juicy flavors and aromas.
Ultimately, that leaves you with a 2-week timeline.
Now, 2 weeks might mean a higher chance of the risk of oxidation, but there is a way to counter it. And it’s through CO2.
When you open your fermenter to add dry hops, purge it with CO2 while adding your hops.
Or, when you’re transferring to your secondary fermenter, make sure you’ve sanitized it first. Then, again, purge with CO2 and do the transfer.
Tip: It’s better to always do a closed transfer system to limit oxygen as much as possible.
How Do You Pressure Ferment NEIPA?
Fermenting under pressure is one hell of a technique. The challenging part, though, is you’ll need a pressure-rated conical fermenter to do it.
Why is that a problem? Because it’s expensive. And for a first-time homebrewer, investing in expensive equipment typically comes later on in the journey.
However, a modified corny keg is a much more affordable option. Make sure you also get a spunding valve as it’s necessary to ferment under pressure.
Some things to keep in mind when pressure fermenting include the following:
- For pressure release during fermentation, use a spunding valve and make sure it’s fully open. Another way is to use a blowoff tube and submerge it in Star San solution or your sanitizer of choice.
- When adding dry hops, remove the pressure first. Then, purge your keg’s headspace with CO2 immediately after you’ve added your hops. Then, quickly close the lid to limit oxygen exposure. And finally, repressurize your keg.
- The sweet spot for adding pressure is 10 to 12 psi. You can go as high as 15 psi. Going any higher may result in fermentation issues or worse – it kills your yeast.
- Don’t add pressure at the start of fermentation. Adding pressure too early restricts ester production. In effect, you won’t get as much flavor from your yeast. So when should you add pressure? Once you’re nearing your final gravity points, add pressure.
How Do You Dry Hop a NEIPA?
Easy peasy.
Open the lid of your fermenter and sprinkle those dry hops as Salt Bae does with his steak.
But here’s the crucial part: Don’t ever take your sweet time when adding your dry hops. If you can do it in under 10 seconds, the better.
This way, you limit oxygen exposure. The best way is to:
- Open the lid of your fermenter
- Add your dry hops
- Quickly purge the headspace of your fermenter with CO2
- Close the lid
When to Dry Hop NEIPA?
A lot of brewers dry hop during high krausen. Krausen is simply the foam buildup on your beer’s surface that happens during fermentation.
And yes, it’s caused by yeast. Now, where does high krausen come in? High krausen is…
- Usually referred to as the second stage of fermentation
- Appearance-wise, it’s a large head of foam that forms on your beer’s surface
- It’s the most active stage of fermentation; typically during the first 72 hours of fermentation
Why is this useful? Because high krausen is when you add your first dry hops. Adding 2 ounces (56.70 g) of dry hops should be good. In fact, 2 ounces (57 g) per gallon (3.8 L) of beer is a good ratio to keep in mind.
A sample dry hopping schedule could look like this:
- Add 1 to 2 ounces (28 g to 57 g) of dry hops during high krausen.
- Add the majority of your dry hops on day 7 or 8 of fermentation. If you’re using a total of 15 ounces (425 g) of dry hops, you would add about 80% of your total dry hops. So, about 12 ounces (340 g) on day 7 or 8.
- Add 1 to 2 ounces of dry hops 3 days before packaging.
How Long Should You Dry Hop NEIPA?
This ultimately depends on your dry hopping schedule. Some may want to explore early dry hopping which is adding dry hops as early as 24 hours after fermentation.
Some might add their dry hops on days 2 or 3 of fermentation then wait until fermentation is about to finish before adding their second dry hops.
Adding your dry hops too early might result in a flavor you won’t enjoy. However, it all depends on your preference.
A good rule of thumb is to dry hop for less than 2 weeks. However, some say the sweet spot is 8 to 9 days. Other brewers have also achieved great results in just 5 days.
Should I Cold Crash My NEIPA?
Yes, you should. One reason is that it’s going to help those fruity and delicate flavors in your NEIPA shine.
Second, cold crashing helps drop out any unwanted particles and hop particles out of your beer faster. Now, you might have heard another definition of cold crashing in beer.
The general definition of cold crashing says it’s meant to clarify beer after fermentation. However, this isn’t going to make your NEIPA clear.
If you do everything right in brewing a NEIPA, there’s nothing to worry about. Any settling particles during a cold crash will drop to the bottom of your keg in a few days.
How Long Should I Cold Crash NEIPA?
Cold crashing comes after fermentation. So, if you ferment for 2 weeks, you would do cold crashing right after for 2 days.
What Temperature Should I Cold Crash at NEIPA?
The best temperature for cold crashing a NEIPA falls between 33°F (0.56°C) to 35°F (1.67°C). Some recipes say a temperature between 38F (3.33°C) to 40F (4.44°C) is good.
However, you can easily use this temperature instead for cold conditioning (more on this later).
Why Do NEIPA Oxidize So Easily?
All beers carry the risk of oxidation, but for a NEIPA, oxidation is the worst that can happen. You get a muddy and ugly brew that tastes like wet cardboard. Not to mention, you end up wasting a good number of expensive hops.
So, why do NEIPAs oxidize so easily? It’s mostly because of 2 reasons: your hops and high-protein grains.
Sure, all IPAs have hops. But NEIPAs take hops to the next level by adding a massive ton of hops.
The flavors in the hops used for a NEIPA are extremely delicate. When exposed to oxygen, those flavors will explode…but not with any fruitiness. It explodes and then dies. Like a star that loses its light.
As for high-protein grains, exposing your grain to oxygen is what leads to a dark color. A dark NEIPA? Yikes!
How Do You Avoid Oxidation in NEIPA?
CO2 is your best friend. It’s as simple as purging your fermenter with CO2 to limit oxygen exposure. That’s it? Not quite.
As you’ll find out in the later sections, kegging is a better solution to avoid oxidation.
Remember. When you add dry hops, you have to open the lid of your fermenter. It’s the only way, after all. As soon as you open it, throw in your dry hops and immediately purge with CO2.
Then, close the lid immediately.
When to Keg NEIPA?
Kegging comes after cold crashing. Generally, you would cold crash for 2 days then cold condition for 5 to 7 days.
When you’re cold conditioning, this usually already happens in your keg. This allows you to mellow down any of the harsh flavors in your NEIPA.
How Soon Can You Use a Keg NEIPA?
Right after cold crashing, purge your kegs with CO2 first. Since you’re transferring beer from your fermenter into a keg, do a closed transfer system.
This will prevent any oxygen exposure. If you’re using a fermenting keg, it’s even easier to do. All you need is a jumper line.
A jumper line is a tube with a liquid disconnect at each end. Connecting your jumper line from your fermenter keg to your serving keg makes the transfer process easy and risk-free.
Either way, always make sure to do a closed transfer system for a NEIPA. Because NEIPAs are highly sensitive to oxygen, you can’t take any chances.
Can You Bottle NEIPA?
You can bottle a NEIPA but it’s also incredibly risky. Not to mention, the results you get from bottling can vary.
It’s harder to adopt a closed transfer system when you’re bottling compared to kegging. For other IPAs that aren’t as sensitive, bottling works out smoothly.
However, considering how sensitive NEIPAs are, it’s best to do kegging instead of bottling.
How to Bottle NEIPA?
The general process is to ferment in your bottling bucket or glass carboy. This is followed by bottling it straight from your carboy or primary fermenter.
Brewers typically use a bottling wand and auto-siphon when bottling straight from their glass carboy. The best way to avoid oxidation in bottling is to brew in smaller batches.
It might also be better to skip cold crashing to prevent any risk of oxygen exposure.
How Long Should You Condition NEIPA?
Conditioning your NEIPA happens through cold conditioning. This should take about 5 to 7 days in your primary fermenter at a temperature between 33°F (0.56°C) to 40°F (4.44°C).
But what happens if you taste a hop burn after you’ve cold conditioned your NEIPA? In that case, extend the cold conditioning for another week.
If you’re thinking of skipping this step, it’s best not to. Why? Because cold conditioning helps prolong shelf life. In addition, it gives your NEIPA a stronger juicy character.
Who wouldn’t want that, right?
If you’re planning to bottle your NEIPA, cold conditioning is also harder to do. Mostly because you have to carbonate your bottles for a couple of weeks at room temperature.
And the biggest problem with that is it makes your beer more susceptible to suboptimal conditions.