What’s the ideal temperature to cold crash beer?
When is the best time to cold crash beer?
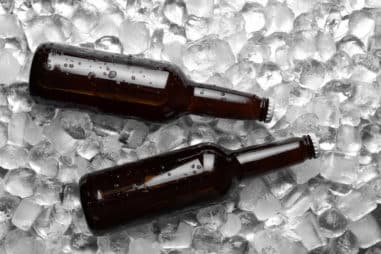
Can you cold crash outside?
How do you cold crash a conical fermenter?
A lot of questions pop up when cold crashing beer. But, don’t worry. This guide will answer all your questions and give you the complete cold crash process.
When Should You Cold Crash Fermentation?
You should cold crash after primary fermentation is complete. This usually means 2 to 3 days before packaging or bottling.
The best way to check when you can cold crash is through a hydrometer. A hydrometer tells you when your beer solution has reached its final gravity. In other words, once your beer has reached final gravity, fermentation is complete.
In fact, you could even wait 10 to 12 days after pitching your yeast, then cold crash.
Should I Cold Crash in Primary or Secondary Fermentation?
It’s not a good idea to cold crash during primary or secondary fermentation.
Why?
The idea of cold crashing is to allow the suspended particles to clump together and fall out of the solution.
Cold crashing accelerates the process of suspended particles falling to the bottom of your fermenter. In effect, it’s easier for you to siphon beer or perform a closed transfer process without collecting sediment.
The end result? Crystal clear beer.
If you cold crash during primary fermentation, the yeast is still converting sugar into alcohol. Yeast ferments at a certain temperature range.
What happens when you drop the temperature below that range? You deliberately prevent sugar from being converted into alcohol. And you end up with a beer that doesn’t taste as good.
What’s worse is that you also end up leaving Dimethyl Sulfide (DS) in your beer solution. You won’t find Dimethyl Sulfide after fermentation is complete.
But if you stop fermentation midway, then compounds like Dimethyl Sulfide can remain in your beer. This will make your beer taste unpleasant.
Surely, you don’t want that, right?
Does Cold Crashing Stop Fermentation?
Cold crashing will stop fermentation, but it won’t kill the yeast.
When you cold crash too early and stop fermentation, your beer will look fine at first. But the problem is when carbonation happens.
Think of it this way. You prematurely stopped fermentation. Then, once the beer reaches a certain temperature, the yeast starts to do its work. In other words, the yeast will restart the fermentation process after you’ve bottled your beer.
Then, carbonation happens and this is where the problem lies.
The result is overcarbonated beer or bottle bombs. That doesn’t sound pleasant at all. And that’s because it isn’t.
Beer that’s overcarbonated will have a bitter off-flavor. The unpleasant flavor is caused by having too much carbonic acid in your beer.
Can You Cold Crash in the Fermenter?
You can cold crash in the fermenter using a fridge or freezer. Just make sure you sanitized your fermentation vessel before the cold crash.
If you’re kegging, you can cold crash straight from the fermenter using a kegerator. This reduces the risk of oxidation since you don’t have to transfer your beer to another vessel or carboy.
However, you can still opt to transfer your beer to another keg before the cold crash. What this does is allows you to reduce sediment in your beer even more.
How Do I Cold Crash My Fermenter?
To cold crash your fermenter, you need two things:
- A fermentation vessel or carboy.
- A fridge or freezer. If you’re using a freezer, you need an external temperature controller to prevent your beer from freezing.
Once you have your fridge/freezer ready and your carboy or vessel, cold crashing is as follows:
- Grab your hydrometer and test your beer’s final gravity. You want to make sure fermentation is complete before cold crashing your beer.
- Transfer your beer to a carboy or fermentation vessel. Always clean your fermentation vessels or carboys.
- Place your vessel or carboy in your fridge/freezer. The ideal temperature for cold crashing is between 32°F (0°C) to 35°F (1.7°C). Don’t drop the temperatures too low that it freezes your beer.
- Maintain the temperature of your beer for 2 to 3 days.
- Check your carboy or fermentation vessel if your beer is clear.
- Bottle your beer and let it sit at room temperature for a couple more days to carbonate.
Take note, though.
There are other ways you can cold crash beer.
If you’re kegging, for example, you can cold crash your beer in the keg itself. Then, you can purge CO2 in your keg to carbonate your beer (more about this later).
How Do You Cold Crash a Conical Fermenter?
Your best option is to get a glycol chiller. However, glycol chillers can be expensive and if you’re not ready to invest in one, don’t worry. There is another solution. But first, you’ll need to transfer the beer from your conical fermenter to your keg or bottling bucket.
After you’ve transferred your beer to your bottling bucket, perform the cold crash in a fridge or freezer.
If you’re transferring beer to a keg, you can also use a fridge or freezer. Just make sure it’s big enough to store your keg.
Preferably though, it’s better to use a kegerator for a keg. And if ever you decide to use a freezer, you’ll need an external thermostat controller.
Why?
Mainly because you need to regulate and maintain the temperature of your freezer. Should your freezer enter freezing temperatures, so will your beer.
Can You Cold Crash in a FermZilla?
You can cold crash in a FermZilla. Essentially, you’ll follow the same process as you would if you were cold crashing a carboy.
That means you can cold crash your FermZilla in a fridge so long as it’s big enough to hold it. Make sure you keep the temperature of your fridge between 33°F (0.5°C) to 35°F (1.7°C). This is the ideal temperature range when cold crashing beer.
Can I Cold Crash in a Glass Carboy?
You can definitely cold crash in a glass carboy. In fact, glass carboys allow you to check if your beer is clear easily. Just pop open the fridge and you’ll quickly be able to see whether your beer is clear or not.
How Do You Cold Crash Beer in a Carboy?
First, you have to make sure your carboy is clean. It’s always best to sanitize with Star San solution. You can even easily make one at home.
Once your carboy is clean, transfer the beer from your primary fermenter to your carboy.
Now, why transfer the beer to your carboy?
Because this will also help remove sediment. So when you siphon beer to your bottle, there’s less sediment in the solution. As a result, it’s easier to siphon beer without collecting sediment.
The best part? Crystal clear beer.
If you want to cold crash directly using your primary fermenter, sure go ahead. For experienced homebrewers that have siphoned beer countless times, it should work out.
What Temperature Should I Cold Crash My Homebrew at?
The recommended temperature for cold crashing beer is 33°F (0.5°C) to 40°F (4.4°C). Some homebrewers are fine with cold crashing at 40°F (4.4°C).
Usually, cold crashing at 38°F (3.3°C) will already give you good results.
Now, why do some homebrewers opt between 33F (0.5°C) to 35F (1.7°C) in cold crashing?
Well…
The concept of cold crashing is to drop your beer’s temperature to icy cold temperatures ASAP, right?
33°F (0.5°C) to 35°F (1.7°C) is a good temperature range for allowing the sediment to fall to the bottom quickly. But it doesn’t mean you can’t cold crash at 40°F (4.4°C).
Cold crashing also affects your beer’s flavor and consistency in a slight way. At the end of the day, it mostly boils down to preference.
If you want, feel free to experiment with different temperatures. You might be able to tell a noticeable difference between cold crashing at 33°F (0.5°C) or at 40°F (4.4°C).
What Temperature Should I Cold Crash My Lager?
For a lager, the ideal temperature is the same. Cold crashing between 33°F (0.5°C) to 35°F (1.7°C) is a good temperature range.
If you’ve listened to a few homebrewing podcasts, one podcaster mentioned a study about yeast and rapidly chilling beer.
If you rapidly chill beer, the yeast expresses 30% more esters than slowly chilling your beer. That means that dropping your beer’s temperature as quickly as possible yields more ester flavors.
Can You Cold Crash in a Fridge?
Cold crashing in a fridge is one of the best ways to cold crash beer. Within 12 hours, your beer should reach the ideal temperature range.
You don’t need to buy special equipment just to cold crash your beer. Heck, even a chest freezer can get the job done. The only extra tool you’d need for a chest freezer is an external thermostat controller. And it’s crucial that you do use one to prevent your beer from freezing.
How Cold Is Too Cold for Cold Crashing?
Here’s what you need to understand. Beer starts to freeze at 28°F (-2.2°C).
Some homebrewers might go as low as 32°F (0°C) but anything below that and you’re getting awfully close to frozen beer.
In the event your beer freezes, you’d have to thaw it out. Now, this might be a problem for your beer. Other times, it won’t be a big deal.
Either way, that’s one rule you have to remember. Keep your beer’s temperature between 33°F (0.5°C) or at 40°F (4.4°C) during the cold crash. Go below 30°F (-1.1°C) or 32°F (0°C) and you risk freezing your beer.
How to Cold Crash Beer Without a Fridge
There are several ways you can cold crash beer without a fridge. One method is by using a chest freezer. But as mentioned earlier, you’ll need an external thermostat controller so your beer doesn’t freeze.
The other method is to use a cool box. However, you’ll need to make sure —
- Your cool box is big enough for your fermentation vessel to fit.
- You have a lot of ice packs.
A cool box isn’t as efficient as a fridge or freezer. Granted, it will get the job done. By adding ice packs continuously, you should be able to cold crash your beer successfully.
One major difference, though, is that you won’t be able to reach cold temperatures as fast as a fridge or freezer.
If you don’t have a chest freezer, cool box, or fridge, go with the traditional ice bath method. Place your fermenter in an ice bath. Then, wrap your fermenter with water-soaked towels. Of course, the towels also have to be cold.
What’s important to note with this method is you have to continually pour ice to maintain the temperature. You can add salt – lots of salt – to prevent ice from melting too. But still, even with salt to help you out, fresh ice packs do a better job at maintaining the temperature.
Can You Cold Crash to 40 Degrees?
You can cold crash to 40°F (4.4°C) since it does fall in the ideal temperature range. However, there is one fact worth mentioning. Most yeast particles drop out of the solution at any temperature below 40°F.
That means cold crashing even between 36°F (2.2C) to 38°F (3.3C) is fine.
If you’re cold crashing at 40°F (4.4°C), though, expect to wait a little longer. Sometimes, cold crashing beer can take as short as 24 hours.
For some brewers, this might take 2 days. At 40°F (4.4°C), this could take 3 days or even more. Then again, 40°F (4.4°C) is still an acceptable cold crash temperature.
There are a few who even cold crash at 41°F (5°C). So far, the main drawback of this is a longer waiting time.
Ultimately, the best way to tell if your cold crash is done is by checking your beer. Once it’s crystal clear, this should give you enough evidence it’s time to bottle your beer.
Can I Cold Crash Outside?
If it’s wintertime, go right ahead and cold crash outside. You can even cold crash in an uninsulated basement or garage.
There is just one problem, though. You won’t be able to regulate the temperature of your beer as easily. There’s no telling what temperature the weather will be tomorrow.
Sure – it’s winter so cold temperature isn’t a problem. However, you need to be extra careful that your beer doesn’t freeze.
But apart from that, cold crashing outside during winter is a cost-effective solution.
Does Cold Crashing Introduce Oxygen?
Cold crashing has the risk of introducing oxygen, and it’s one drawback you should be wary of. But how does it happen?
Once your beer’s temperature drops, the volume of your beer decreases. In effect, this creates a vacuum that can potentially pull oxygen into your fermenter. This is also known as oxygen suck-back.
If you’re using a traditional airlock or one-way airlock, the risk of oxidation is high.
Fortunately, there are several ways to prevent your beer from oxidizing.
How Do You Prevent Oxidation When Cold Crashing?
You’re already aware that oxygen is beer’s worst enemy. Oxidized beer is stale beer. It tastes bad, and frankly, it costs you time and money.
So, how do you prevent oxidation when cold crashing? There are a good number of solutions. Some are homemade, while some might mean spending roughly $50. But if it means saving your beer, why not, right?
Below is a table with a list of solutions to prevent your beer from oxidizing during a cold crash:
| Solutions to Prevent Beer From Oxidizing During Cold Crashing | Explanation |
| Use a more secure airlock | As mentioned earlier, a one-way airlock isn’t a good option. During the cold crash, it creates negative pressure in your fermenter. In effect, it will suck back liquid from the airlock and into your fermenter.
Instead, use a two-way or S-shaped airlock. A 3-piece airlock is also a good option. |
| Buy a CO2 Harvester Kit | A CO2 Harvester Kit is one investment you won’t regret buying. The way it works is it captures any CO2 produced during active fermentation in a mason jar. The captured CO2 is sucked back in your fermenter during the cold crash.
Essentially, it ensures that the only gas that’s vacuum-sucked into your fermenter is CO2. You can buy it from NorthCal Brewing Solutions. It comes with a manual to show you how to use it too. |
| Pressurize your fermenter | If you’re using a conical fermenter or keg, you can pressurize your fermenter. This will offset the pressure drop during a cold crash. A good psi of CO2 for this to work would be 5 to 7 psi.
Take note that this doesn’t work for a bottling bucket. Pressurizing a nonpressurizable vessel might lead to your vessel exploding. |
| Use a CO2-filled mylar balloon | Another term for this method is The BruLoonLock. Essentially, it’s a mylar balloon that’s taped to a rubber stopper or bung. Duct tape or masking tape works well with this.
Simply attach your mylar-filled balloon to your fermenter when fermentation is about to end. This should collect enough CO2 to prevent any oxygen from being sucked into your fermenter. |
| Perform fermentation in a keg | The beauty of kegging is it’s a lot easier to cold crash without the risk of introducing oxygen. You can simply ferment in your keg. Then, close the pressure relief valve and seal it. Finally, you can cold crash in your fridge or kegerator.
After the cold crash, you can transfer the beer from your fermentation keg to a sanitized keg. This, of course, will be a closed transfer process. And that means the beer in your keg isn’t exposed to oxygen at all. Just make sure to purge your sanitized keg with CO2 first. You can also pressurize your primary keg with 5 to 7 psi of CO2 right before the cold crash. This way, you’re fully assured no oxygen enters your fermenter. |
Do I Need an Airlock When Cold Crashing?
You don’t always need to use an airlock when cold crashing. Some homebrewers simply use a solid stopper to seal their carboy.
Other homebrewers will use sanitized foil over your carboy’s top and neck. However, if you prefer to use an airlock, don’t use a one-piece airlock.
You should at least use a 2-piece (S-shaped) or 3-piece airlock. If you fill your airlock with vodka or a sanitizing solution, you don’t have much to worry about.
Some oxygen might still inevitably get into the fermenter, but it’s a minor consideration. Why?
Brewers at Brulosophy conducted an experiment on the impact of cold crashing with an airlock. The intention was to determine whether oxygen suck-back could oxidize your beer and turn it stale. In other words, are the effects of oxygen suck-back during cold crashing significant enough to ruin your beer?
The brewers at Brulosphy brewed two beers:
- Beer that was cold crashed
- Beer that wasn’t cold crashed
Both beers followed the same brewing recipe. The only difference between the two was that one beer was cold crashed, while the other beer wasn’t.
Of course, a 3-piece airlock was used for both. So, what happened next? Was there oxygen suck-back? Yes, there was. Even with a 3-piece airlock, a good amount of sanitizer solution was sucked into the beer along with some oxygen.
But here’s where it gets interesting.
After the cold crash, the beer was racked into a keg and then bottle conditioned for some time. The same goes for the noncrashed beer. Then, both the cold-crashed and noncrashed beer actually…
- Had the same appearance
- Smelled the same
- Tasted the same
There was a total of 26 people with varying levels of experience who participated in the experiment too. They were served a sample of the cold-crashed beer and a sample of the noncrashed beer.
What’s surprising is they weren’t able to tell the difference between the beer that was cold-crashed from the beer that wasn’t.
Considering the noticeable oxygen suck-back in the cold-crashed beer, you might expect an off-flavor. Or maybe even a darker color.
But that didn’t happen. The case and point being, even a minor oxygen suck-back isn’t going to destroy your beer.
You can rest easy knowing that sure, an airlock does come in handy, but even a solid stopper can get the job done.
If you want to read more about it, you can check out the site Brulosophy. It’s an interesting read.
How Do You Cold Crash With an Airlock?
For starters, don’t cold crash with a traditional airlock. Instead, go with a 2-piece or 3-piece airlock. Don’t forget to fill your airlock with Star San solution too.
For every 5 gallons of water, you would add 1oz. of Star San. However, if you’re using smaller amounts of water, the ratios are as follows:
- For every 1 gallon (3,785 ml) of water, use 0.2 oz. (29.6 ml) of Star San solution.
- For every 16 oz. (473.2 ml) of water, use 0.74 ml (0.03 oz.) of Star San solution.
- For every 8 oz. (236.6 ml) of water, use 0.37 ml (0.013 oz.) of Star San solution.
It’s best to use a 5 ml (0.17 oz.) syringe so you can approximately measure the Star San solution. In fact, some homebrewers will discard using an airlock. Instead, they’ll opt for a bung or sanitized foil.
Once you’re about to cold crash, simply attach your airlock to your fermenter and that’s it. But here’s the thing. If you want to make sure zero oxygen gets into your fermenter even with an airlock, there is one approach.
And that’s what you’ll find out in the next section.
How Do You Cold Crash Beer Without Sucking It Back?
So, you have your airlock filled with your Star San solution. In the event you used vodka, that’s fine too. But what happens if you notice a small amount of oxygen suck-back 2 days after your cold crash?
Don’t worry. It won’t destroy your beer. But if this one moment worries you and you want to make a clean batch without any oxidation, strap in.
The best approach you can take to cold crash beer without sucking it back is to use a CO2 Harvester Kit. NorCal Brewing Solutions has one for roughly about $50.
You could buy the Harvester Kit from NorCal or, you can make one at home. How does a CO2 Harvester Kit work?
First, it captures CO2 during active fermentation in a mason jar. When cold crashing starts and the volume decreases, your fermenter sucks back CO2 instead of oxygen.
A CO2 Harvester Kit will have the following components:
- Krausen catcher with 4 nipples (used for capturing and storing CO2)
- Krausen catcher with Airlock Grommet (Where you’ll attach your 3-piece airlock to)
- 28 inches (2.3 ft.) silicone tubing
- 2 silicone gaskets for sealing the mason jar
You’ll have to cut the silicone tubing into 2 tubing pieces (about 3/4 as tall as your mason jar) and one tubing that’s about 1 ft. (12 in.) long.
The 1 ft. (12 in.) tubing is what you’ll use to connect both Krausen catchers. Picture a rainbow. Except it’s a silicone tube and it’s connected to each nipple in a Krausen catcher.
The rest of the silicone tubing will go to your fermenter’s blow-off tube. And finally, your 3-piece airlock should be attached to the Krausen Catcher with the airlock grommet.
NorCal Brewing Solutions has a video on YouTube as well to explain the entire process. You can simply go to YouTube and search Jaybird CO2 Harvester Kit from NorCal Brewing Solutions.
Should I Cold Crash My Yeast Starter?
You can crash your yeast starter, but you’re not also required to do so.
If you ask several homebrewers, they’ll give you different answers. Some will say you should cold crash then pitch your yeast. Some will tell you it’s better to pitch your yeast in your starter wort. Either way, it’s entirely up to you.
In addition, this is a good way for you to determine how yeast impacts your beer when you cold crash it or don’t.
When Should I Cold Crash My Starter?
If you plan on cold crashing your yeast starter, the best time to crash it isn’t a definite answer. The general rule is to pitch yeast once you’re ready to brew your beer.
Honestly, you don’t need to wait for the perfect time to cold crash your yeast. Throw it in the fridge and take it out as soon as you start brewing.
This way, you can let your yeast sit until it reaches its pitching temperature. The pitching temperature varies depending on the yeast strain too. Fortunately, the product label has information on the proper pitching temperature for your yeast.
However, if the product label doesn’t provide any info, pitch your yeast at a temperature between 35°F (1.7°C) to 40°F (4.4°C).
How Do You Cold Crash a Yeast Starter?
There’s no hard-fast rule on how to cold crash your yeast starter. You simply place it in your fridge and pitch the yeast at a temperature between 35°F (1.7°C) to 40°F (4.4°C). Some homebrewers will let their yeast warm until it reaches wort temperature. Then, they pitch their yeast after decanting.
Some companies like White Labs will include instructions on how to cold crash your yeast.
One example is to cold crash your yeast then decant off 80% of the clear liquid from the top. While doing this, make sure you don’t disturb the yeast layer below.
Once the wort and your yeast are the same temperature, you can rouse your starter yeast back into suspension. Be sure to rouse it with any remaining malt solution.
Finally, pitch your slurry into the wort.
As you can see, there are different ways to cold crash yeast. Whichever method you choose isn’t right or wrong.
After all, there’s a lot of trial and error in homebrewing. At the end of the day, feel free to experiment and decide which works for you best.
How Long Does It Take to Cold Crash a Starter?
You can leave your yeast starter overnight in your fridge and it will be fine the next day. There’s no specific timeline for how long it takes to cold crash a yeast starter.
The only concern you have to take note of is to make sure your yeast doesn’t end up freezing. That means don’t leave your yeast starter in the fridge for a week. That’s obviously going to do more harm than good.
Does Cold Crashing Kill Yeast?
Cold crashing doesn’t kill yeast. Put it this way. There’s a reason why yeast has to be pitched at a certain temperature.
That’s because for yeast to be active and do its job, it has to be within that certain temperature range. Once you drop the temperature below that range, your yeast goes to sleep.
Think of lower temperatures as like a sleeping aid for yeast. The lower you go; the sleepier yeast gets. Once you’ve hit your cold crash temperature, your yeast is fast asleep.
Does Cold Crashing Remove All Yeast?
Cold crashing doesn’t remove your yeast. It simply allows all the yeast in suspension to clump together and drop out of the solution.
The yeast is still there. And that’s why you add sugar after cold crashing to let your beer carbonate. If cold crashing removed all the yeast, you’d have to pitch yeast again. In effect, that would make cold crashing pointless.
Once the yeast settles to the bottom, it’s easier for you to rack beer without transferring sediment into your sanitized keg or vessel. Alternatively, it’s also easier for you to siphon your beer into your bottles. As long as you don’t siphon from the bottom of your fermenter, you won’t collect sediment.
Should I Cold Crash Before or After Dry Hopping?
It’s a matter of preference. Some prefer dry hopping before cold crashing while others prefer to dry hop after cold crashing.
Interestingly, Mitch Steele of Stone Brewing Co. suggests you should cold crash first, then dry hop after. And then you have Brulosophy. What’s interesting is that Brulosphy has a project called Exbeeriment.
In one of their Exbeeriments, they studied the effects of cold crashing before and after dry hopping. The result? Cold crashing before dry hopping yielded a smoother and less intense hoppy beer. Cold crashing after dry hopping yielded more hoppiness and a sharper, hoppy bite.
So, which one is better? It depends on personal preference.
If you prefer your beer to have that sharp hoppy bite and a more pungent fruity note, you should cold crash after dry hopping.
But if you prefer your beer smooth and less hoppy but still has good aromatics and flavor, then cold crash before dry hopping.
Can You Dry Hop and Cold Crash at Same Time?
You could dry hop and cold crash at the same time, but it will take a lot longer to extract the hop flavor. Why? Because of the cold.
But even if it takes longer to extract the hoppy goodness in your beer, that doesn’t mean it’s wrong. In fact, the colder temperature can be beneficial for your dry hops. How so? Mainly by preventing any vegetable flavors in your beer.
Ever heard of Scott Janish? He’s the co-founder of Sapwood Cellars. He’s also a homebrewer, by the way. In one of his studies, he mentions that if you dry hop one day before cold crashing, you get the most extraction.
Other homebrewers also agree that cold crashing and dry hopping at the same time give you a smoother beer and less resinous beer. However, you do lose some aroma.
Ultimately, it’s all about your personal preference.
Can I Dry Hop After Cold Crash?
You can dry hop after your cold crash. In fact, Mitch Steele of Stone Brewing Co. recommends it. He suggests to cold crash first and then add your dry hops.
His advice goes on to suggest that you shouldn’t dry hop when there’s still a lot of yeast in suspension. And that’s because yeast tends to suck up or stick to hop compounds. That means it could fall out of your beer during a cold crash.
Does Dry Hop Time Include Cold Crash?
You’ll get mixed answers for this. Some will say that they don’t include cold crashing days in their dry hop time, while some do.
The thing is, dry hopping at colder temperatures is equivalent to half a day. Remember: the lower the temp, the longer the extraction.
So, if you want to include cold crashing in your dry hop time, you could put it that way. A full day your dry hops spend in a cold crash is like half a day.
In a way, you could say that cold crashing counts as part of your dry hop time. But if you cold crashed for 3 days with your dry hops added a day before you cold crashed, then…
That’s roughly about 2.5 days total.
Does Cold Crashing Affect Dry Hopping?
Yes, cold crashing affects dry hopping in several ways. One of the most obvious ways is the extraction time. Since you’re dry hopping at lower temperatures, you extract less per minute compared to dry hopping at higher temperatures.
Hop flavors and aromas don’t break down easily. In lower temperatures, they still break down, but gradually.
Another effect cold crashing has on dry hopping is aroma and flavor. If you’ve tried cold crashing after dry hopping, you’ll notice a sharper and stronger hoppiness in your beer. You’ll also get a stronger aroma or a more pungent fruity flavor note.
But if you cold crash before dry hopping, you get a smoother beer. The hoppiness is also less intense. And the beer has a less resinous flavor note. However, the aroma isn’t as strong.
Does Cold Crashing Drop Hops?
Cold crashing can drop hops depending on when you dry hop. Wait – what does that even mean? It’s a good thing you asked.
When you dry hop and then cold crash, it can lead to dropping your hops. Here’s what happens. The yeast will suck up your hop compounds, which eventually drop to the bottom of your fermenter.
Now, don’t take this the wrong way. The yeast doesn’t eat your hop compounds. It’s more like the hop compounds attach to the yeast. During the cold crash, the yeast particles clump together with the hop compounds attached to it.
You know what happens after, right? The yeast particles along with the hop compounds drop or fall out of the beer solution. As a result, you get less hop aroma.
Can I Cold Crash While Carbonating?
If it means saving a day or so, you can cold crash while carbonating beer. However, you need to use a specific set of materials and make sure you don’t set the pressure too high.
If you open the dump valve without a barb hose fitting, you’ll punch straight into the yeast. And it’s not going to end well. You’ll end up with a huge mess.
Heck, it might even turn into a viral funny meme.
You’ll need a 1/2″ hose barb fitting and the thinnest hose. This will help you slow down the flow rate and prevent any viral mess from happening. Without it, you might just end up having a shower covered in trub/sediment.
Since you’ll be pressurizing your fermenter, keep it at 10 to 12 psi too.
Can You Cold Crash Carbonated Beer?
By the time your beer has finished carbonating, it’s ready for drinking. That means if you cold crash it, well, you’d get cold beer but that’s about it.
First off, you need to understand that the main goal of cold crashing is to drop any particles in suspension to the bottom of your fermenter. Another goal of cold crashing is to get crystal clear beer.
Once your beer has carbonated, then it means your beer has finished bottle conditioning. If you cold crash your beer at this point, you would simply get an icy cold beer.
Does Cold Crashing Affect Carbonation?
If you’re thinking, “Will cold crashing risk the carbonation process?”, then no it won’t. However, the time it takes for your beer to carbonate will be longer.
After you cold crash, you should give your beer a couple of days to carbonate.
Why is that so?
Because there’s less yeast in your beer. With less yeast in your beer, the more time yeast needs to carbonate and create that fizz.
How Do You Carbonate Beer After a Cold Crash?
That depends. Are you kegging or bottling? If you’re kegging, you need to hook your keg to a CO2 tank and force carbonate your beer from there.
If you’re bottling, it’s all a matter of waiting and adding priming sugar (more on this in the next section).
Can You Bottle Carbonate After Cold Crash?
Yes, you can bottle carbonate after a cold crash. In fact, you should carbonate your beer. Because if you don’t, you’ll end up with flat-tasting beer.
Not exactly worth all the time and effort you put into your homebrew, right?
As mentioned earlier, bottle carbonating is all about waiting and adding priming sugar. First, the waiting.
How long do you have to wait exactly?
It depends. Here’s a better explanation. After you cold crash your beer, the current temperature of your beer isn’t the ideal temperature yet.
That means your yeast is still dormant or asleep. You have to wait a few days for the temperature of your brew to increase.
Once your brew’s temperature rises, the yeast will slowly wake up and carbonate your beer. As a general rule of thumb, bottle carbonation takes between 7 to 14 days.
Why so long? Mainly because you cold crashed your beer. Cold crashing doesn’t mean you removed the yeast. However, there will be lower levels of yeast in your beer. As a result, carbonation will take longer.
Now, what about priming sugar? How much priming sugar should you add? And what type of priming sugar should you add?
All those questions will be answered in the next section.
How Much Priming Sugar to Add for Bottle Carbonation?
First, you need to know the types of priming sugar you can use for bottle carbonating. There are 3 types you can use:
- Dextrose/Corn Sugar: Corn sugar is affordable and readily available. It won’t alter the flavor of your beer.
- Sucrose/Table Sugar: Table sugar is a readily available homemade ingredient. However, some homebrewers opt to not use table sugar because it apparently alters your beer’s flavor. But the truth is it doesn’t. It’s similar to corn sugar.
- DME/Dry Malt Extract: DME is unfermented wort dried into powder form. Compared to corn and table sugar, DME adds body and flavor to your beer.
How much priming sugar should you add? Here’s a good starting point for each priming sugar. For every 5 gallons of beer, you should add…
- 2/3 cup (160 ml) of table sugar
- 3/4 cups (180 ml) of corn sugar
- 1 1/4 cup (300 ml) of DME/dry malt extract
If you want a more precise calculation, you can use a free online priming-sugar calculator.
Should I Cold Crash Before Kegging?
It’s a matter of preference. Cold crashing before kegging is the same as cold crashing before bottling. Some homebrewers prefer not to cold crash, while others do.
Now, you might be wondering…is there a benefit to cold crashing before kegging? If you’re expecting a difference in flavor, then not so much.
However, cold crashing your beer will give you clearer and a more aesthetic-looking beer. Not to mention, it makes your beer more stable and longer-lasting. How is that possible?
Because cold crashing aids in the removal of sediment, this prolongs your beer’s shelf life. Ever wonder why unfiltered beer has a shorter shelf life than filtered beer?
That’s the point.
Why Do You Cold Crash Before Kegging?
The reasons why you would cold crash before kegging depend on the homebrewer. If you want to achieve clear beer without adding finings, gelatin, or isinglass, then go for it.
If you want a beer that’s free of sediment, do a cold crash before kegging. Or, if you simply want crystal clear beer that gives off a golden shine when sunlight strikes it, go for the cold crash before kegging.
There are a lot of reasons why you should cold crash before kegging. Say, for example, you’re brewing a heavily dry-hopped IPA.
Should you cold crash before kegging or not? For starters, cold crashing is more beneficial for dry-hopped beers or any beer that use a ton of hops and grains. Why? Because the more hops and grains, the more sediment in your beer.
The case in point? Without cold crashing, it’s more likely to find sediment in your beer. Not to mention, you might end up clogging your siphon or dip-tube due to a large number of suspended particles.
And finally, cold-crashed beer will look identical to crystal clear commercial beers. It’s so identical that it’s hard to tell them apart. If that appeals to you, then all the more you should cold crash before kegging.
How Long to Cold Crash Beer Before Kegging?
Cold crashing before kegging works the same way if you’re bottling. That means cold crashing should take between 1 to 3 days.
This also ultimately depends on how fast you can bring down your beer’s temperature. The faster you bring down your beer’s temperature, the shorter the timeframe is.
Do You Have to Cold Crash Before Kegging?
Not necessarily. Cold crashing leans more towards an optional step in the brewing process. However, if you prefer to have a beer that’s free of sediment, then you should cold crash.
Alternatively, you can also add gelatin or finings to your beer to improve its clarity. Some homebrewers will add finings, like Irish Moss, during the kettle boil followed by gelatin after fermentation.
It’s worth noting, though, that cold crashing is a highly effective method for reducing sediment in your beer. In addition, cold crashing is more beneficial when you keg. How so?
Here’s a quick science lesson. It’s easier for cold beer to absorb CO2 compared to warm beer. That means it’s easier for you to carbonate later on.
Can You Cold Crash in the Keg?
Yes, you can cold crash in the keg directly. This saves you time and effort in racking beer from your primary to your secondary fermenter.
In fact, the best practice is to cold crash directly in the keg. Why? Because it prevents introducing oxygen into your beer.
Not only does it reduce the risk of oxidation, but cold crashing directly in your keg is a lot easier. After fermentation, you can simply place your keg in a fridge or kegerator.
How to Cold Crash in a Keg
Cold crashing in a keg is similar to how you would cold crash your carboy. The only difference is that you don’t need to transfer beer from your keg to another keg.
You can cold crash directly from your keg. Here’s how it’s done:
- Wait for fermentation to finish. You can use a hydrometer to check your final gravity.
- Once fermentation is complete, place your keg in a fridge or kegerator.
- Maintain a temperature between 33°F (0.6°C) to 40°F (4.4°C).
- Wait for 2 to 3 days for cold crashing to finish.
- Check if your beer is clear.
- Start the carbonation process of your beer.
If you don’t have a fridge or kegerator, a chest freezer also works. Just make sure to install an external thermostat controller to prevent your beer from freezing.
Another alternative is a simple ice bath. Make sure you fill your ice bath continuously with ice to maintain the cold crash temperature of your beer.
Should I Cold Crash in Fermenter or Keg?
Either way is fine. Whether you prefer to cold crash in your fermenter or keg, both will work. What matters more is achieving the ideal cold crash temperature and preventing any oxygen suck-back.
With a keg, it’s easier since you can hook a CO2 tank to offset any difference in pressure during a cold crash. With a bottling bucket or carboy, a 2-piece or 3-piece airlock will do the job. However, there’s a chance that a small amount of oxygen will be sucked into your fermenter.
Using a CO2 Harvester Kit or even a homemade CO2 Harvester Kit is one of the best ways to prevent oxygen suck-back. That is, if you’re bottling. You’ll find a complete explanation for this in the previous sections found in this guide.
Should I Cold Crash Before Bottling?
Yes, it’s better to cold crash before bottling. If you bottle and then cold crash, it’s harder to determine when the carbonation process will finish.
If you cold crash after bottling, this might disrupt your carbonation process. In effect, it could affect the way your beer carbonates and you’ll end up with improperly carbonated beer.
When you cold crash before bottling, any sediment will settle to the bottom of your fermenter. This way, you actually benefit more in 2 ways:
- It’s easier to siphon beer into your bottles without collecting sediment.
- The carbonation process will be smooth sailing.
Should I Cold Crash NEIPA Before Bottling?
For heavily dry-hopped beers like NEIPA, it’s best to perform a cold crash. Although cold crashing a NEIPA is optional, there is one benefit worth noting. And that’s less trub sitting at the bottom of your fermenter.
For any beer that uses a ton of hops and grains, expect more sediment or suspended particles in your fermenter.
If you want to prevent as many suspended particles and trub, you should cold crash your NEIPA. But wait – does that mean you’ll remove the haze in a NEIPA?
Not quite. If you use the right ingredients and add a lot of high-protein grains, you won’t lose any haze. It’s important to remember that even if cold crashing can reduce sediment, it’s a different story from haziness.
Haziness is caused by several factors. And reducing any suspended particles in your beer doesn’t mean you’ll get a clear NEIPA.
How Do You Cold Crash Beer Before Bottling?
To cold crash beer before bottling, follow these steps:
- Check if fermentation is complete by using a hydrometer.
- Once fermentation is complete, transfer your beer to a sanitized carboy or fermentation vessel.
- Place your carboy or vessel in a fridge or freezer.
- Maintain a temperature between 33°F (0.6°C) to 40°F (4.4°C).
- Check if your beer is clear after 2 to 3 days.
- Bottle your beer. Let your beer sit in room temperature to warm up and begin carbonating.
How Long Can I Cold Crash Before Bottling?
The time it takes to cold crash depends on how cold your beer gets. If your beer’s temperature can reach between 33°F (0.6°C) to 35°F (1.7°C), expect 1 to 2 days for cold crashing to finish.
Either way, you shouldn’t be too worried about overextending a cold crash. The main downside of overextending a cold crash would be a longer carbonation time.
The best way to tell cold crashing is complete is by looking at your beer. Once it’s clear, you can move on to letting your beer carbonate.
In case you find that your beer isn’t as clear as you expected, don’t let this bother you too much. Your beer will continue to clarify after you’ve bottled your beer.
Can You Cold Crash in Bottles?
You can cold crash in bottles but that would defeat the point of cold crashing. Why? Because you’d still have sediment sitting at the bottom of your beer bottle.
Not to mention if you plan to cold crash in a bottle and siphon it after to remove sediment, that would complicate the process.
Instead, allow cold crashing to happen in your fermentation vessel or carboy. Once it’s done, you can siphon beer into your bottles and let carbonation take its course.
That way, the process is simple and straightforward.
Can You Bottle After Cold Crash?
Yes, you can bottle right after cold crashing your beer. You simply need to wait a few days to allow your beer’s temperature to rise. Now, why wait for the temperature to rise?
Because this will allow the yeast to wake up and do what’s necessary for carbonation to happen.
Some homebrewers have asked in the past if you should intentionally warm your beer after cold crashing. This isn’t necessary. You should let the temperature rise on its own instead of adding an external heat source to warm your bottle.
When Can I Bottle After a Cold Crash?
You can bottle your beers right after a cold crash. Yes – there’s no need to wait. The waiting process happens after that.
Because cold crashing reduces the time it takes for beer to carbonate, you should give it a couple of days or even a week. Some even wait for 2 weeks.
Generally, the stronger your homebrew/beer, the longer carbonation will take. After the cold crash, bottle your beers, add your priming sugar, and let the temperature rise. Eventually, the yeast will wake up and begin carbonating your beer.
How Do You Bottle Beer After a Cold Crash?
First, make sure all your bottles are sanitized. That includes your bottle caps. If you want, you can boil your bottle caps for a good 10 minutes to ensure it’s clean for bottling day.
Then, follow these steps:
- Rack your beer into your bottling bucket using your autosiphon.
- Make sure your siphon doesn’t start at the bottom of your fermenter. That’s where all the trub is.
- Add your priming sugar to your bottling bucket. Make sure you follow the right priming sugar-to-water ratio.
- Transfer your beer into your bottling bucket.
- Once you’re done, you can lift it up and place it on your counter so it’s easier to siphon into your bottles.
- Attach your bottle to the end of your siphon hose.
- Start filling each bottle with your beer.
- After filling your beer bottle, grab your capper and cap your bottle to seal it.
- Store your beer bottles for 1 to 2 weeks to allow carbonation to happen.
Can I Bottle Condition After Cold Crashing?
Yes, you should bottle condition after cold crashing. If you don’t, how else will your beer carbonate, right? Without carbonation in your beer, you’ll end up with a flat-tasting beer.
After all, bottle conditioning is crucial to your beer’s quality and overall flavor. It’s not just about your beer’s fizziness. As mentioned earlier, expect bottle conditioning to last between 1 to 2 weeks. This is because cold crashing reduces the time it takes for beer to finish carbonating.
As for priming sugar, don’t forget to add the right ratios as well. To give you a good idea, here are some ratios to follow. For every 5 gallons of beer, you should add…
- 2/3 cup (160 ml) of table sugar/sucrose
- 3/4 cups (180 ml) of corn sugar/dextrose
- 1 1/4 cups (300 ml) of DME/dry malt extract
- ½ to 1 cup (118 to 237 ml) of honey
Should I Cold Crash Before Bottle Conditioning
Yes, it’s better to cold crash before bottle conditioning. For one, it’s easier to transfer beer to your sanitized bottling bucket without collecting sediment.
Second, if you bottle condition first and then cold crash, it could spell trouble for carbonation. Disrupting the carbonation process can lead to an improperly carbonated beer.
Once bottle conditioning has started, it’s best to leave your beer and wait for carbonation to finish.