Primary Fermentation is quite simple and easy to do. It uses simple equipment, save for the hydrometer, but workable nonetheless.
You’ll take from here some brewer tips and tricks. So, switch on your learning mode so that after, you can avoid a fermentation disaster.
What Is the Purpose of Primary Fermentation?
Without Primary Fermentation, you will be drinking a sickeningly sweet beverage. Without your yeast workforce, there will be no alcohol to speak of.
During this phase of brewing is where the yeast gets to do their alchemy. You should give them a good environment to work in. They won’t disappoint.
What Are the Two Primary Fermentation Pathways?
To be clear, when talking about beer fermentation, that is anaerobic fermentation. With that in mind, the Two Primary Anaerobic Fermentation Pathways are:
- Lactic Acid Fermentation
- This refers to the conversion of sugars into lactic acid. The same kind in yogurts, Lambics, and the stuff that makes your muscles ache after a good flex.
- Alcoholic Fermentation
- Now, this is what you want in your beer. This fermentation path converts sugars into CO2 and alcohol. This is the forte of yeasts in particular.
What Happens During Primary Fermentation?
The main effects of Primary Fermentation fall into the following events:
- Your wort becomes devoid of oxygen. The yeast sucks it up.
- Your wort tends to become more acidic.
- You will get a population explosion of yeast.
- They will generate alcohol and CO2.
- They will also create some by-products, with some more desired than others.
- They will convert most of the sugars. The more efficient the strain of yeast, the “dryer” the resulting beer.
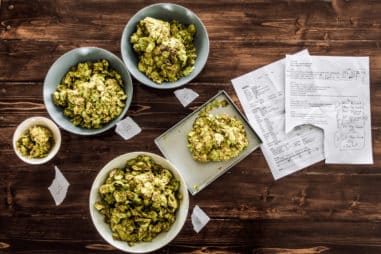
- “Kräusen” starts to form in the headspace of your fermenting vessel.
What Is Kräusen?
Kräusen is a by-product of the active stage of fermentation. Because the yeast releases a lot of gas, loose insoluble materials rise up to the surface of the wort. It looks like a foamy head filled with debris. This debris is a collection of grain husks, hops, proteins, tannins, and the like.
Glass or Plastic for Primary Fermentation?
The material of your Primary Fermentation vessel is critical. Here are some key qualities you should consider when deciding:
| Properties | Glass | Plastic |
| Accessibility | The typical narrow neck makes it harder to clean and access the contents. | Plastic Buckets give full access to cleaning, pouring, and adding last-minute ingredients. |
| Oxygen Seal / Airtightness | Yes | Lets in the air after a prolonged period. |
| Scratch Resistant | Yes | Not perfect. Depends on the type of plastic. Normally tends to scratch. |
| Transparent | Perfect for observation. | Characteristically opaque. There are some transparent ones but become cloudy over time. |
| Weight | Heavy. Handle with care. | Lightweight |
| Capital Cost | Expensive | Cheaper than glass. |
If you can spare a few bucks, go straight for the stainless-steel vessels as the big players do.
Bucket or Carboy for Primary Fermentation?
Some beer kit makers recommend a bucket for primary fermentation. There are pros and cons for each type of vessel. The funny thing is, there is no such thing as a glass bucket. Nevertheless, choose whichever gives you the best result for the following concerns:
| Characteristics | Carboy | Bucket |
| Accessibility | The typical narrow neck makes it harder to access the contents. | Plastic Buckets give full access to pouring and adding last-minute ingredients. |
| Ease of Cleaning | For the tight neck, you will need special tools like a carboy brush. | Plastic Buckets give full access to cleaning, pouring, and adding last-minute ingredients. |
| Headspace | Just enough space to minimize oxidation and infection. You will need additional equipment to deal with Kräusen. | A lot of headroom for foam expansion. More space to suck in the air though. |
| Material | Plastic and Glass | Plastic |
It seems like the Carboy is a bad choice, isn’t it? Not really. If you consider the positive aspects of glass carboys, you will get the best of both worlds.
Can You Use a Carboy for Primary Fermentation?
If you are a beginner, this is not advised. It is very easy to get frustrated with the drawbacks of the accessibility of most carboys. It is much harder to see the bigger picture of its advantages.
Imagine the following scenarios that novices might get into:
- You want to add more hops for some reason.
- The ”Kräusen” is unleashed and about to break your vessel.
- Cleaning is annoying with the narrow choke of a carboy’s mouth.
If you have the right knowledge, patience, and tools, you can work around all these problems.
Can I Use a 5 Gallon Carboy for Primary Fermentation?
You can definitely use a 5-Gallon Carboy. However, you need to set up a system to deal with the ever-expanding monstrous foam. A common technique used by homebrewers is the “Blow-Off Method.”
How to Deal With the Kräusen
Subduing the Kräusen requires you to use a kind of overflow called “Blow-Off Method.” This is only applicable if you have limited headspace like when using carboys.
This method has a simple setup that requires the following:
- Several feet of plastic tubing. Get the largest diameter that fits in your carboy’s mouth.
- You will connect the tube in the mouth.
- You need to seal it at the mouth to avoid leakage.
- There are adaptors available in case you have sealing problems.
- A container for the “blow-off” material. A bucket will do.
- This bucket needs to be partially filled with water or sanitizer to maintain an airlock.
This system is passive so the only thing you need to do is leave it on for the active phase of the fermentation process. Of course, this is assuming you used a relatively large container for the foamy debris.
Do I Need an Airlock for Primary Fermentation?
You need Airlocks for fermentation. It releases the gas buildup in your system without introducing contamination. You want to solve this as passively as possible. You would not want to be opening your vessel manually. This is assuming you have a perfectly airtight seal, to begin with.
Airlocks have their problems though. Its size is not really all that large so a massive surge in pressure can be an issue. Furthermore, it is easily blocked with debris. This makes pressure surges all the more problematic.
You can build one yourself if you have a knack for engineering stuff.
What Is Needed for Primary Fermentation to Start?
Here is a list of things to consider to start your Primary Fermentation right:
- Pitch Your Yeast in the vessel of choice.
- Prime the yeast at your wort’s temperature.
- The wort should be around the target fermentation temperature. This makes the yeast as comfortable as possible.
- Seal Your Vessel.
- Rock Your Vessel. This oxidizes the wort. You need to do this to prepare the conversion process.
- Store the Vessel in a cool and dark place right around the target temperature.
What Are the Primary Fermentation Temperatures?
Always check your recipe’s instructions. But you can always follow the following general rules:
- Ales: 62 to 75°F (17 to 24°C)
- Lagers: 46 to 58°F (8 to 15°C)
- You can start fermenting lagers at ale temperatures. Just make sure that when the process has advanced, you cool the wort to the recommendation.
- Lagers take longer to ferment because the cold slows a lot of things down, even yeast.
How Long Until Primary Fermentation Starts?
To get the microbe party started, they need a warmup period of around 12 hours. You don’t need to do anything after pitching them. Just make sure you made all the needed preparations beforehand like:
- There is enough starter oxygen in the wort.
- Setting the temperature right on the money. If you don’t have a handle on the vessel’s environment, this can change.
- Keep away from light sources. Covering the glass container is a must if the light is an issue.
How Long Is Primary Fermentation for Beer?
Primary Fermentation has roughly two stages. The first stage lasts two to three days. This is when the yeast is very active. The second stage goes from one to two weeks. This is a very common recommendation from beer kit makers. What affects the ranges are based on:
- How Cold or Hot the environment is.
- Colder takes a longer time.
- Hotter takes a shorter time.
- Too hot or too cold kills your yeast so take care.
- Type of Recipe
- If the grain bill results in a lot of sugar in the wort, this takes longer to digest.
- High alcohol brews take longer because alcohol limits yeast growth like cold does.
- Type of Beer
- Lagers take a longer time. This is because of the fermenting temperatures.
- Ales takes a shorter time for the same reason as lagers.
How Long Does Primary Fermentation Take for Lager?
Depending on the Lager class, Primary Fermentation runs for one to three months. Science and Physics have established the fact that the cold slows down metabolism. That said, lagering makes yeast slower to go about its business.
How Long Does Primary Fermentation Take for Ipa?
Ales like IPAs have Primary Fermentation runs of one to two weeks. Some high alcohol ones like DIPAs could go for two weeks. You could argue that the alcohol content drives the duration in this case. However, always make validations with your hydrometer.
How Long Does Primary Fermentation Take for Porter?
Porters are dark beers, and dark beers need one to two weeks in Primary. There really is not much to say other than follow the instructions of your recipe. And, use the hydrometer sparingly.
How Long Does Primary Fermentation Take for Stout?
Stouts are like Porters when it comes to Primary Fermentation. One to two weeks and you are done. Higher alcohol versions can net you two weeks of waiting. Of course, we are only talking about Primary here. This range excludes plans for racking your beer after.
What Do You Do During Primary Fermentation?
There are many things you can do while Primary Fermentation is underway. It is more than just a waiting process. You can do the following:
- Pick up your hydrometer and record readings. You would do this at specific intervals only.
- You can do taste tests if you have a spigot on your fermenter. Avoid opening the vessel needlessly otherwise.
- You can Dry Hop your beer with some fine aromatics. Spiking with “special” ingredients is not uncommon at this stage.
- And finally, you can clean up the mess from beer foam if you have sealing troubles.
Should I Stir My Beer During Primary Fermentation?
Under normal circumstances, avoid stirring DURING Primary Fermentation. This is the fastest way to contaminate your beer with unwanted guests and oxygen.
You may stir the wort BEFORE the start of Primary Fermentation. This is part of the startup. Otherwise, you reserve stirring for scenarios like a stalled fermentation that you confirmed.
How to Stir My Beer During Primary Fermentation?
If you have absolutely the need to stir, you should follow these protocols:
- Use a Long Tool. A long stirrer or spoon should reach the bottom of the container.
- Sanitize Before Going In. Minimize any contamination at all costs, wipe all your tools.
- Don’t Agitate the Top of the Wort. You don’t want more oxygen at this stage.
- Reseal Your Bucket or Carboy.
How to Dry Hop During Primary Fermentation?
You can do the Dry Hopping process in Primary Fermentation. Some brewers swear that the most active phase is the best time to send in the hops.
Some unverified research suggests that yeast strains bring out beneficial compounds from hops. Allegedly, the best time to put in hops is when the yeast is most aggressive. You should try the beer experience yourself and note the difference.
The more mainstream time to do dry hopping is after the peak of active fermentation. This is after three days from the introduction of yeast. Brewers dry hop at this point because there is less CO2 that will carry away the advantages of dry hopping.
Does Primary Fermentation Need Oxygen?
Oxygenating the wort is essential for yeast growth. However, you should do it before Primary Fermentation. If you add oxygen during fermentation, you will be dealing with some bad oxidation. Oxygen will spoil your beer and bring about a permanent haze.
Imagine metal oxidizing. Rust is a bad thing. Now, imagine a rusty beer. Nasty stuff.
How to Avoid Oxidizing Beer
You can manage oxidation during fermentation through the following precautions:
- Minimize Transferring Beer from one container to the next. This is the reason why some brewers frown upon secondary fermentation.
- Bottle Directly After Primary Fermentation. This follows the same logic as avoiding beer transfers.
- Use Glass Fermentation Vessels. Glass is impervious to air, unlike plastics.
- Minimize Splashing. If you do go about moving beer around, keep it calm. Work slow and steady.
- Check Your Seals. Be conscious of the airtightness of your vessels. Check them regularly.
- Purge Your Headspace With CO2. This heavy gas forms a nice layer above the wort.
When Is Primary Fermentation Complete?
The signs of fermentation reaching a stop are quite visual. But, it does not mean that it is an effective tell of complete Primary Fermentation. You have to undertake confirmatory steps to be absolutely sure. You would not want to have a half-fermented beer, now would you?
How Do I Know When Primary Fermentation Is Complete?
Here are some cues you can refer to when reaching Primary Fermentation’s completion:
- You Airlock Is Silent. When bubbles are few and far between, fermentation time is up.
- Kräusen Is Down. The foam in your vessel has subsided.
- Your Wort Is Calm. No more raging waters.
- Yeast Cake Down Under. Your yeast clumped up to form a cake and sank.
These are visual cues that signal you to take the next step of verification.
What Is the Surest Way to Know Your Primary Fermentation Is Complete?
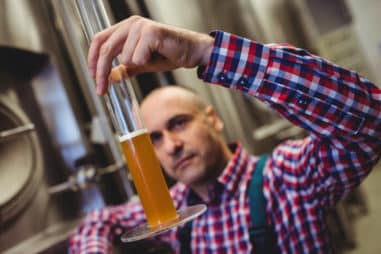
A surefire way to know Primary Fermentation Is Complete is via hydrometer readings. This tool measures the density of a liquid. In this case, you will be measuring the density of a wort turning into the density of alcohol.
To know if the process is complete, you take successive readings on different dates. If you observe no large change, that is a good sign. And then, you cross-reference the reading with the recipe’s target value.
If there are temperature swings in your area, you will need to make corrections to your readings. You should refer to your apparatus’ manual.
When to Stop Primary Fermentation for Beer?
The most prevalent wisdom on when to hit the brakes on Primary Fermentation is four weeks. Beyond that, you have to think seriously about racking or straight-up bottling. Although, always check your recipe. Who knows, you might be making a Lambic. That beer takes forever.
How Long Can You Leave Primary Fermentation?
Four to Six weeks is the sweet spot for safely overstaying Primary Fermentation. This is mostly for the most basic of beer classes. It just gives enough time to really do a full conversion of sugar to alcohol. It also helps the yeast clean up any undesirable by-products.
Can Primary Fermentation Be Too Long?
If you overshoot your recipe’s Primary Fermentation, that is a bad thing. Your hero yeast will start dying off. There is nothing left to eat so cannibalizing is the only option. When that happens, off-flavors begin spreading in the beer. Nothing good comes out of death in beer.
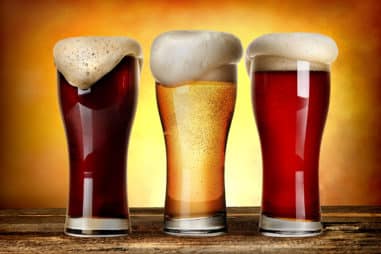
What Does Beer Look Like After Primary Fermentation?
The visuals you would get from a completely Primary Fermented beer are:
- A clear-looking beer because the floaters should have settled sufficiently.
- It is possible not to be as bright since there are lesser particles reflecting light.
- The beer reaches its relatively final hue.
What to Do After Primary Fermentation
After Primary Fermentation, you have several options like:
- Racking to the Secondary Fermenter. You are transferring clear beer while leaving behind most of the insoluble stuff.
- Directly Bottling Your Beer. If you have had enough of the brewing process and just want a drink with some buddies.
Can You Bottle After Primary Fermentation?
You definitely can bottle your beer after Primary Fermentation. You just need to ensure that fermentation is done because exploding bottles is a thing. If you rely too heavily on visual cues for completion, bad things can happen.
Some yeast can act finished, but then they get right back into the groove after a short break. Don’t be in a hurry to bottle your beer. You are going to have to trust in the fact that the flavor will get better later rather than sooner.
Can You Drink Beer After Primary Fermentation?
For sure you can drink beer after Primary Fermentation. It is something chefs and cooks do. You need to taste what you are making to know if you are going in the right direction. To be specific, you will be looking for:
- fermentation completeness,
- the flavor profile match,
- any lacking hoppy character, and
- any off-flavors that you need to address.